Sometimes I get a serious craving for a gooey, chocolatey s’more but there’s no campfire in sight. And this is how these incredible microwave S’mores came to life. They give you all that melty, delicious goodness in under 5 minutes and they are dangerously addictive!
When was the last time you enjoyed a good old fashioned s’more? For a lot of us, it is a favorite treat from childhood. Or, if you are like us, we haven’t really grown up and still love them still to this day. Maybe it is the kid in us.
With this easy recipe you certainly don’t have to be in the backwoods with a roaring fire to enjoy a nice marshmallow treat. In just a couple of minutes, you can enjoy this childhood treat.
🍫 Ingredients
I will be shocked if you’re not drooling by the end of this post. It’s so convenient to be able to make these in a microwave.

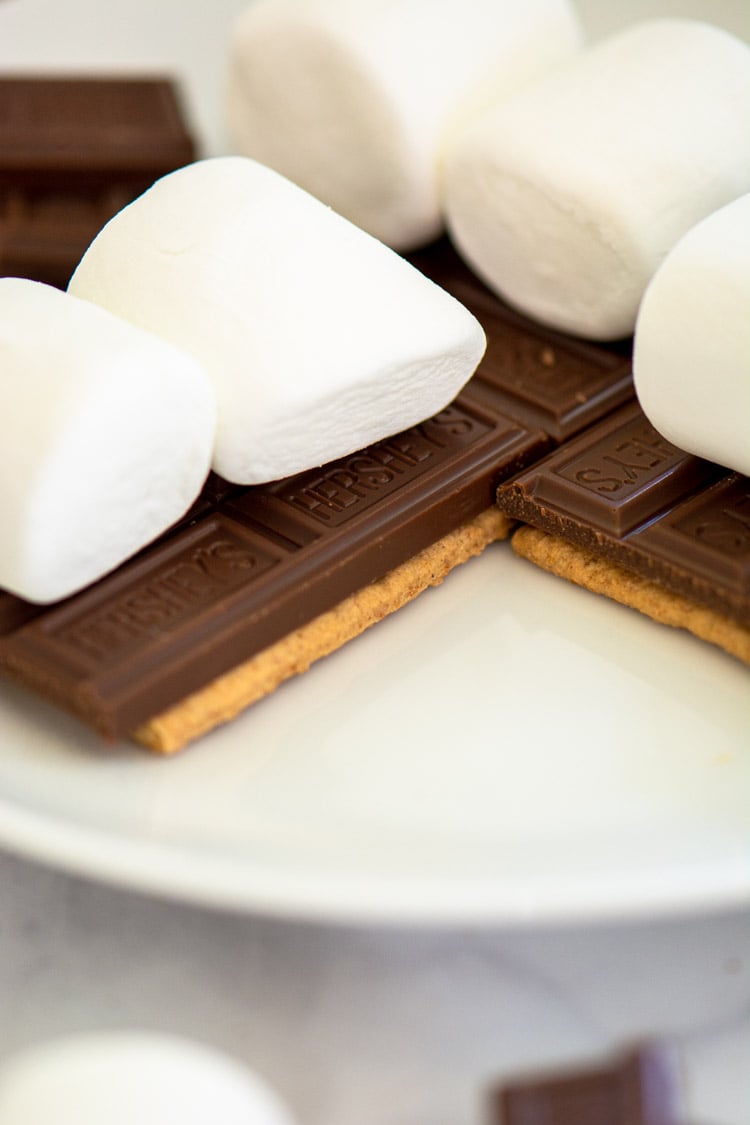
✅Hershey’s Milk Chocolate Bars – You’ll need two bars for 6 s’mores. That first bite is going to rock your world!
✅Jet-Puffed Marshmallows – I chose the square marshmallows since they’re the perfect shape! You can choose any style or variety you like, though. I also show you how to make them if you can’t find the square variety.
✅Honey Maid Graham Cracker Squares – We prefer the flavor and texture of the honey maid graham crackers, but use any flavor or variety you like.
🧑🍳 Instructions
I made mine in a microwave-safe baking dish because we wanted to make enough goodies to last for our movie night. Feel free to microwave them individually or on a large plate – the important thing is to keep them on a flat surface while microwaving, otherwise the marshmallow will ooze off the graham cracker.

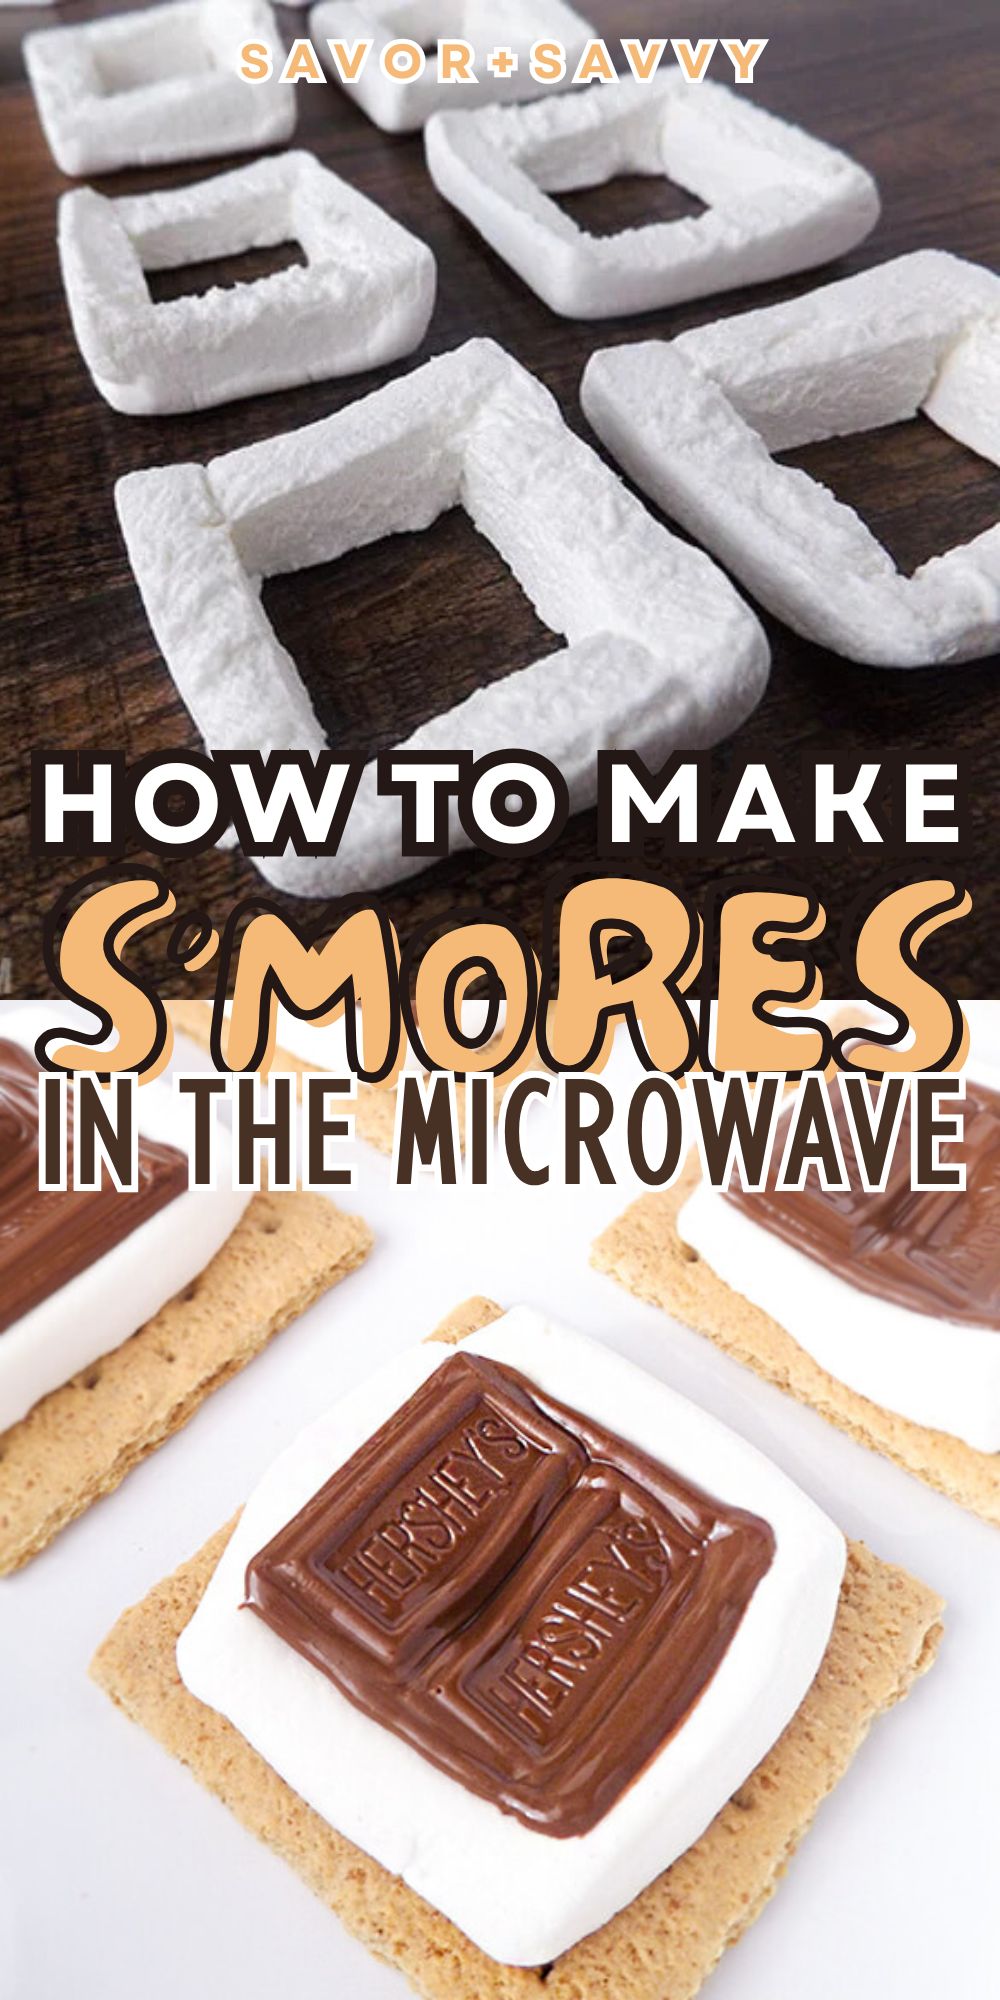
👉Step 1: Cut marshmallows in half to take off a little height and keep them from expanding wildly in the microwave. The easiest way is to make one clean cut straight through – the marshmallow will practically cut itself, it’s pretty neat to watch!

Here’s my trick for a clean s’more – cut out the center of the marshmallow! This will give it room to expand in the center rather than expanding up and out. I just cut a square directly through the marshmallow and pushed the center through to completely remove it. This part takes a few minutes. But if you want to save some time and don’t mind things getting a little messy, feel free to skip this step!

👉Step 2: Place the graham cracker squares on a microwave-safe dish and microwave it for fifteen seconds. Then place the cut marshmallows, sticky side down, on the center of the cracker and pop two pieces of Hershey’s on top of each one.

👉Step 3: Microwave s’mores for 10 seconds (anywhere from 10 to 15 seconds was perfect for our microwave). If you choose to skip carving out the center, I’ve found 10 seconds to be the sweet spot, but the time will vary slightly depending on your microwave.
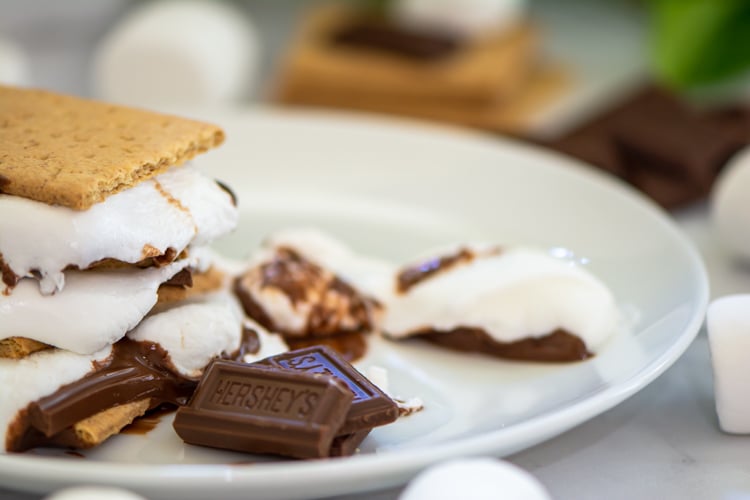
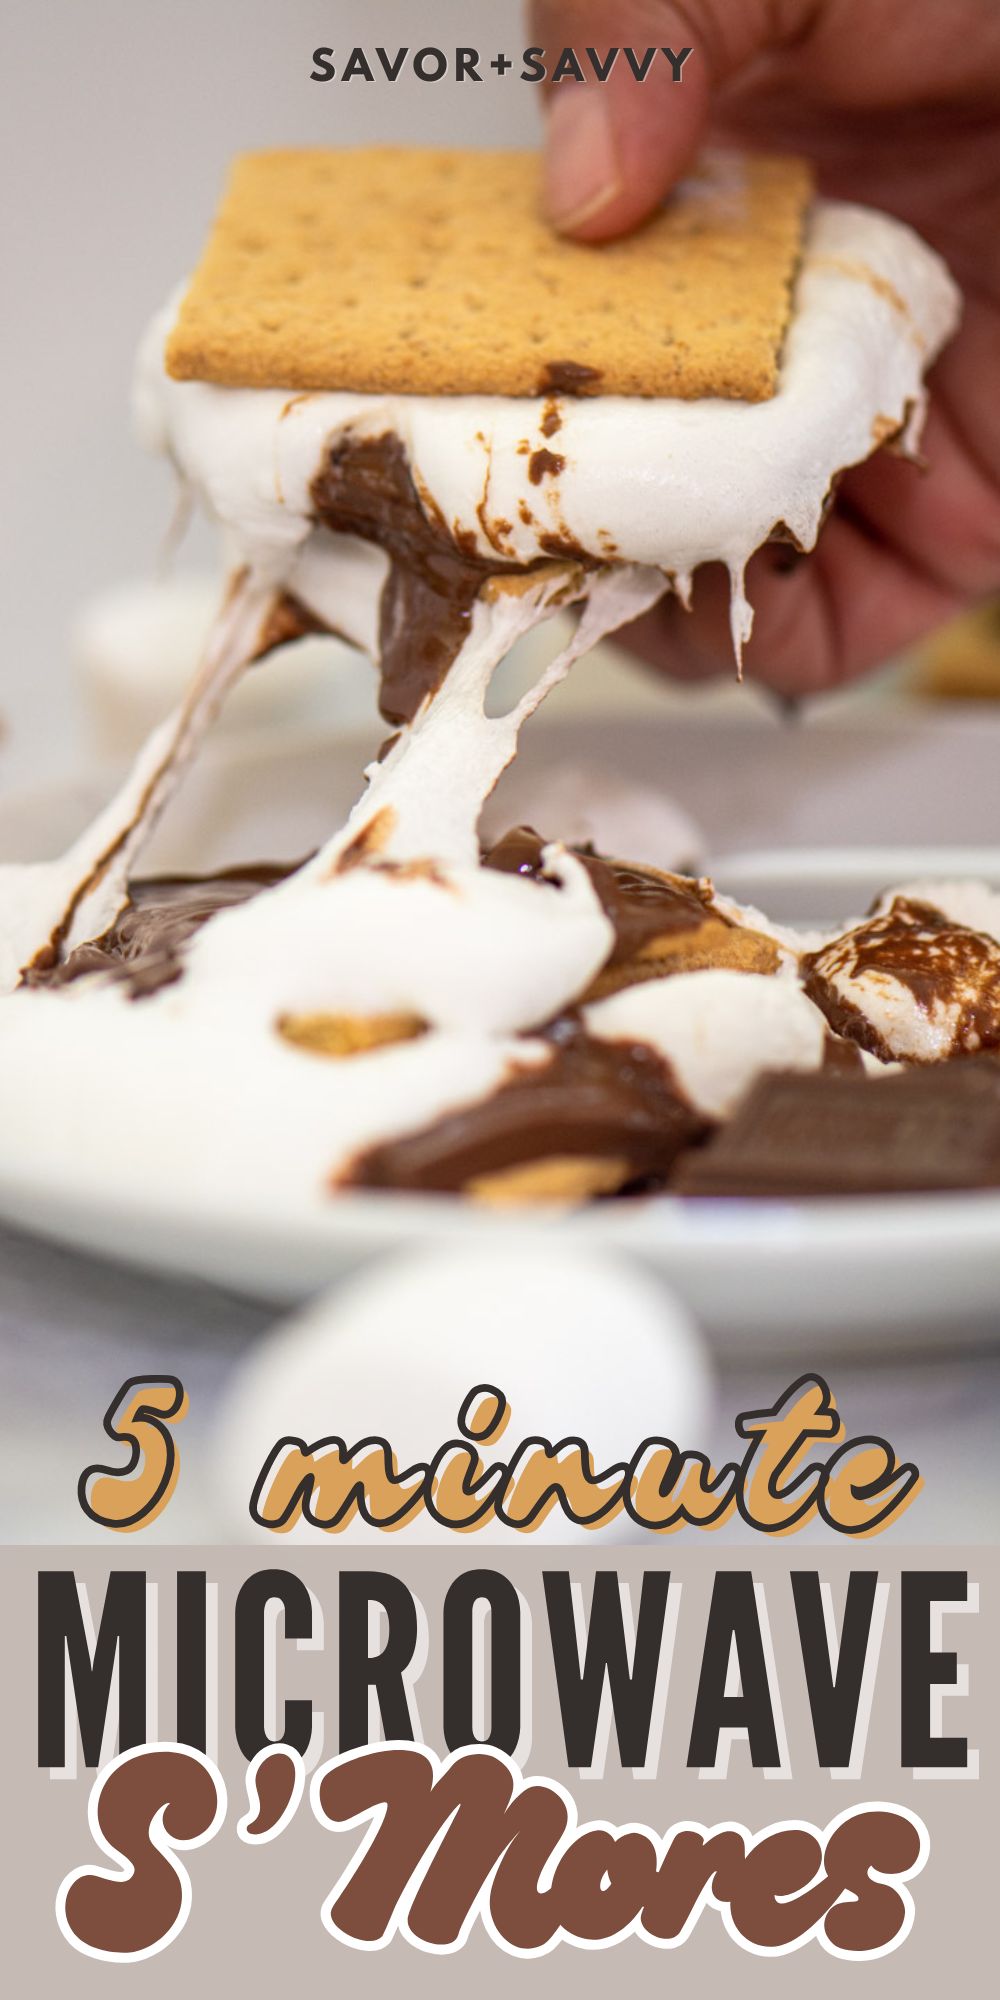
Leave them open face like this or add on another graham cracker on top.

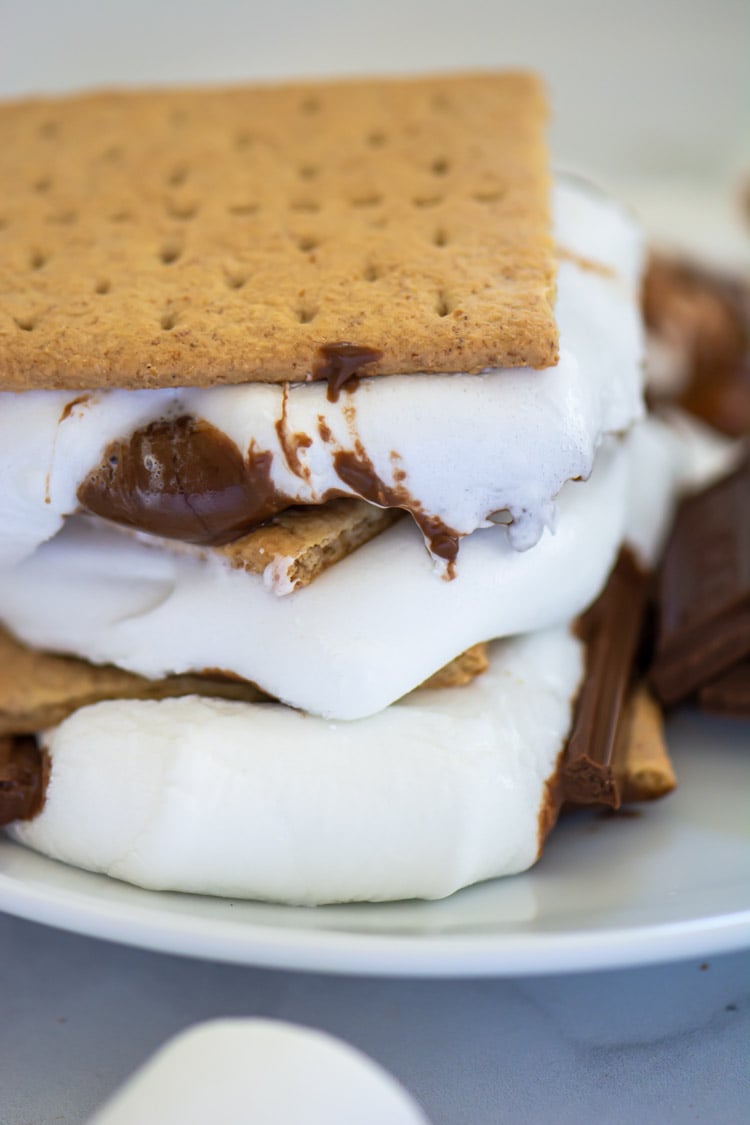
And here they are – ready to eat just a few seconds later! It’s such an easy and quick dessert, and while it’s not the same as a campfire s’more, it’s a pretty sweet second for something you can make conveniently at home in no time at all!
We had ours with a side of Netflix for a quick and easy dessert on a laid back summer night in. But I bet these would be super fun for a kids’ sleepover or just something fun to do with the kids after dinner!

I picked up everything I needed for my microwave s’mores at my local Walmart – all three items were set up next to each other, so it was super quick to grab and go!
📌 Expert Tips
- Use a serrated bread knife to cut the marshmallows.
- If you find the marshmallows too sticky, spray the knife with a little bit of non stick spray and it will glide through the marshmallow.
- The marshmallows have a tendency of expanding and totally overtaking the chocolate and the graham cracker. That is why I really like to cut the center out. It’s a little crazy, I know, but it works to stop the marshmallows from getting everywhere!
Do you have a favorite way to make s’mores indoors? Please share in the comments below!
🔥 Using Regular Marshmallows
Given that not every store has the larger marshmallows (I know my local grocery store does not), I took photos and would love to share how they turned out.

👉Step 1: The process is still the same. Add the graham cracker to a microwave safe dish and microwave it for 15 seconds. Layer the Hershey’s Chocolate on next.
👉Step 2: Add two regular-sized marshmallows to the graham cracker and microwave it for 10-15 seconds. I started with ten, and they looked like they needed a couple more seconds. The extra seconds made them huge and gooey (so much for the mess-free for these!).

The chocolate softened, and when I pressed the sandwich together, it became absolutely decadent. The pictures show how much the marshmallow expands and spreads with the chocolate.
I understand that not everyone will love that much of a gooey, messy dessert but it is so much fun and delicious!! It’s like eating ice cream in a cone vs a cup!
❓ Recipe FAQ
No, they won’t have the gooey melted chocolate/marshmallow texture if you do. You can save time by prepping everything on the microwaveable plate and covering with Saran Wrap until you are ready though. Then it’s just putting them in the microwave and pressing go.
You can. I have even used Reeses Peanut Butter Cups for a fun twist.
Do you have a favorite way to make s’mores indoors? Please share in the comments below!

Mess Free Microwave S’Mores Bites
Ingredients
- 1 bag Jet Puffed Marshmallows squared ones were used here
- 2 Hershey Milk Chocolate Bars
- 6 Graham Crackers
Instructions
- Prep a flat service to microwave on like a microwave safe plate or baking dish.
- Cut marshmallows in half to take off a little height. It will keep them from expanding in the microwave as well. Do this by cutting straight through the middle with a sharp, serrated knife.
- Cut out the center of the marshmallow. This will give room to expand up and out and not worry about making a huge mess in the microwave.
- Place graham cracker on microwave safe dish and microwave for 15 seconds. **This is only for the graham cracker, this isn't a typo. You want to warm it up for a few seconds first.
- Add marshmallows to the center of the graham crackers, sticky side down.
- Place two pieces of Hershey’s on top of each one. Microwave for 10 seconds. Check and see if they need an additional 5-10 seconds.
Notes
Nutrition
Hi!
Ginny Collins is a passionate foodie and recipe creator of Savor and Savvy and Kitchenlaughter. Indoors she focuses on easy, quick recipes for busy families and kitchen basics. Outdoors, she focuses on backyard grilling and smoking to bring family and friends together. She is a lifelong learner who is always taking cooking classes on her travels overseas and stateside. Her work has been featured on MSN, Parade, Fox News, Yahoo, Cosmopolitan, Elle, and many local news outlets. She lives in Florida where you will find her outside on the water in her kayak, riding her bike on trails, and planning her next overseas adventure.
So easy and no cleanup needed!
I make mine even cheaper by using regular soda crackers & chocolate chips. I add a layer of peanut butter too – yummy! I also use mini marshmallows – only about 1 or 2 per cracker 🙂
Oh good ideas! Especially with mini marshmallows – less expansion and no cutting required!