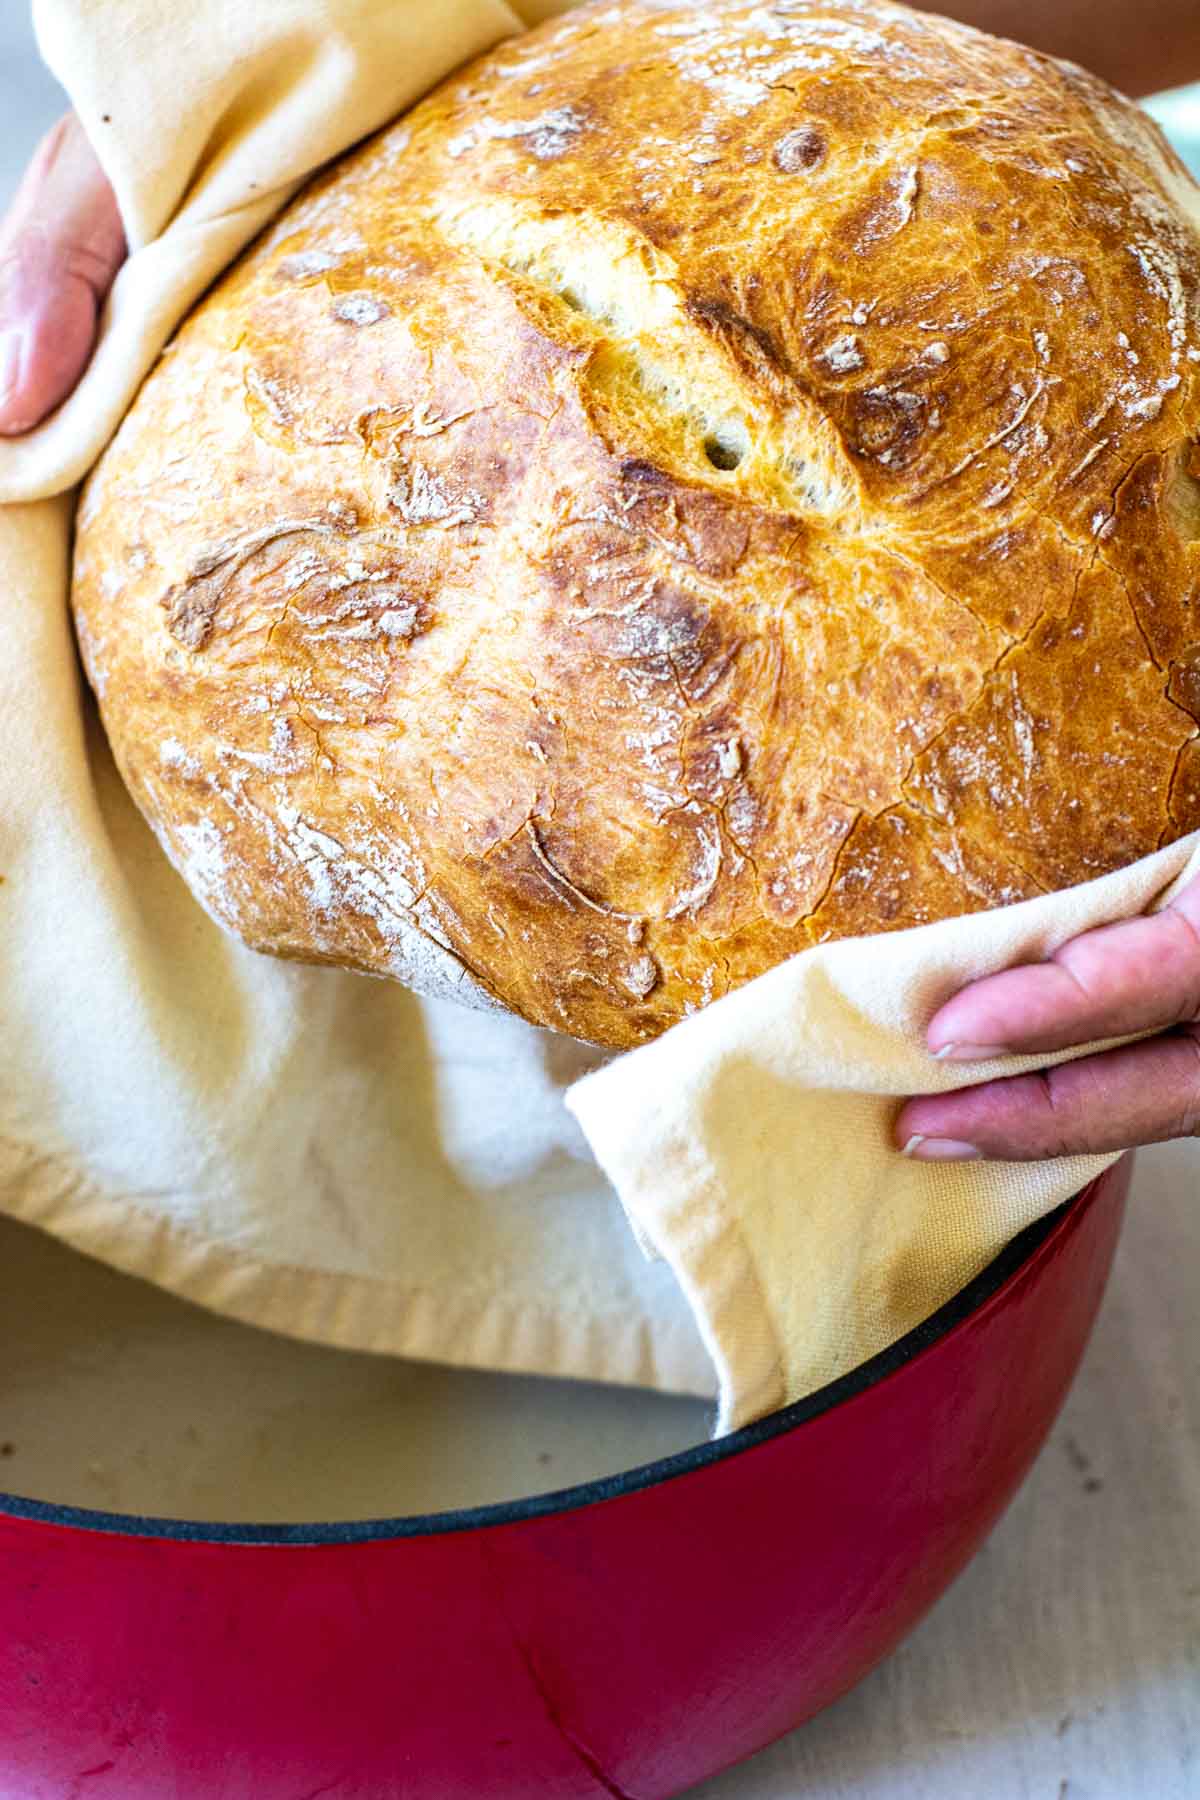
No Knead Dutch Oven Bread is a decades old classic that needs to be re-visited from time to time because it is so EASY! If you have never made this, it’s a great bread for not only seasoned bread bakers but also beginners. This tried and true winner will build that self confidence to tackle yeast breads.
📒 Short History
Last week, I was on the phone talking to my mom about the fact that I was prepping for this recipe. My mom spent ten minutes that flooded in memories of HER grandmother making it too.
So, step away and realize that my mom is 79 and we know the recipe is OLD! Sorry, mom! I loved listening to her stories and hearing that she was taught how to make this bread when she was little.
After researching a bit more, I found out that No Knead Bread has been around since the early 1700’s. Eliza Smith’s book, The Compleat Housewife, first featured the bread. Yes, the spelling of “Compleat” is correct for the title!
One of the things the best things about this bread recipe is that it is almost foolproof. Now, you are dealing with yeast, but since you aren’t getting too technical or kneading the bread a certain amount of time, it is wicked easy.
The intimidation level comes down quite a bit here.

🍴 Why This Recipe Works
No Kneading: This recipe is categorized as a bread that uses the process of a long fermentation to make the gluten instead of shortening the time by kneading. Time is the best tool to work the bread to a super fluffy inside and a perfect crusty outside.
Easy Enough for Everyone: Everyone can make this bread and it will turn out successful. The stress of watching it rise and the yeast not proofing is all gone away. The only thing to watch is that you don’t overcook it as it will get to be too hard.
Frugal: Looking at the recipe and thinking of its past, you know this has to be made on a budget. Flour, yeast, salt and sugar. That’s it. Those were staples for generations.
Perfect for Dinner or Snack: You can use this as a portion of your dinner or add a bit of peanut butter or homemade jam to this bread for a snack everyone in the family will love. We love our easy Strawberry Mango Freezer Jam or Instant Pot Orange Marmalade. You can even make an old fashioned batch of butter to slather on top of each slice.
🍞 Ingredients

Imagine biting into a warm piece of freshly baked bread. Let me just say it’s pure heaven! Yummy! Anyway, let’s talk about a few of the tasty ingredients you need:
Flour: The flour is what gives you the bulk of the bread. All-purpose flour will work beautifully and tastes great too.
Warm Water: It’s vital to use warm water and not cool or hot. Both hot or cold will not work well with the yeast. Mixing yeast with warm water will allow it to do its job, and you’ll end up with a fluffy loaf of goodness.
Sugar: You don’t need to add a lot of sugar to the bread recipe, but just a couple of tablespoons. It provides you with a subtle sweetness that’s fantastic. It also provides the fuel for the yeast to do its magic.
We love to serve this with our Instant Pot Bolognese, Instant Pot Stuffed Pepper Soup or Minestrone Soup.
🍽️ Instructions

One of the reasons I wanted to feature this bread here is that it is EASY! (yes, all-caps EASY!) Our readers love easy-to-make, easy-to-get-done recipes.
We are all a busy group, right? We want delicious homemade food, but we need it fast and without spending hours in the kitchen.
That is where this comes in! Make homemade bread without a machine for your family and friends and learn a classic baking skill at the same time.
Step One: Combine the flour, water, yeast, salt and sugar into a bowl and stir with a wooden spoon. It comes together in no time and using a mixer is really not needed. This is another reason it is great for anyone starting out on their bread making journey.
Step Two: When the dough has been fully mixed, form it into a ball and cover with Saran Wrap or Press n Seal. Keep it covered for 16-24 hours. You do have some flexibility to make this work with your schedule.
Step Three: When you are ready to bake, simply remove the dough from the bowl and gently form it into a ball again. Heat the dutch oven to 450 degrees. Preheating that is a critical step, so don’t skip it.
Optional: If you want to make two deep slits on top of the ball of dough, do this after you put it into the hot dutch oven, being careful to not burn your arms. (Trust me – be careful!) If you want to make the slits, spray the knife with non-stick spray to help it glide through the sticky dough.
Step Four: Cover with the lid and bake for 45 minutes. Remove the lid and cook for another 10 – 15 minutes to get that gorgeous golden brown crust.
Tip: Check your bread at 25-30 minutes and see how it is doing. If you want an outer crust that is crunchy and your oven tests low – go for the full time. If you like a crispy (not as hard) of an outer bread, go for the lower time and you might be happier.
The end result of this bread creates a very soft and airy inside with a crusty outer layer that is perfect for dipping in oils/herbs or spreading on butter and jam.
🥘 Meal Prep
I put this in almost every post so I feel like I have to still put it here even though this is pretty much 100% meal prep! You are prepping this the day or evening before and can pop it into the oven when you are ready the second day.
🥄 Variations
There are so many things you can do with this bread! A few of my favorite things to add:
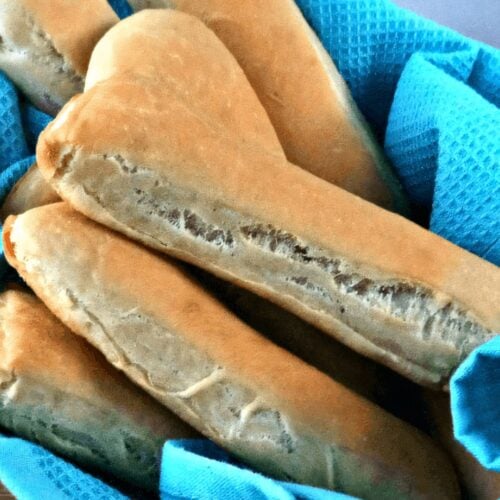
- Rosemary and thyme to make a delicious Herb Bread
- Cinnamon and raisins and you have the Cinnamon Raisin Bread
- Craisins and orange zest for a great Cranberry Orange Bread
- Blueberries and lemon zest for a Lemon Blueberry Bread

Thanks for our awesome readers, I want to note that if you want to use herbs you will use 2-2 ½ tablespoons of FRESH herbs or 2-2 ¼ TSP of dried herbs. Also you will mix that in with all the ingredients at the beginning!
Recipe FAQ
It cooked too long. Make sure that your oven is calibrated to the correct temperature. Most of our ovens are off and having an oven thermometer really helps. I always suggest readers check recipes early and often when you aren’t sure.
As long as you have a pan that can heat up to 450 degrees and has a lid, you should be good to go.
Most common answer is that there is too much flour in the bread. Remember, especially with baking, how important it is measure properly by spooning flour into a dry ingredient measuring cup and then leveling off. Don’t be tempted to SCOOP the flour out of the bag or container, that is a sure fire way to get too much flour into your recipe.
The yeast may not have been good or it was too old. The flour could be old.
The last reason is that there might be too much liquid or moisture. The dough needs to be sticky but not out of control. If you need to add flour, add it by the teaspoon at a time but try not to overwork the dough either or it will get tough. I promise, this is an easy recipe but sometimes there might be a reason someone has an issue and I want to make sure we cover them all.
No knead bread means that you are not going to need the dough on a floured surface. It helps to eliminate a lot of the elbow work that goes into other bread recipes!
If you use active dry yeast, you just need to make sure to activate your yeast ahead of time. By doing that you will just add your yeast to warm liquid, with a bit of sugar. Let it sit for 5-10 minutes. The yeast will begin to foam up, and that is when you know the yeast is blooming and active.
Not sure if you can freeze this bread? You sure can! Just allow it to fully cool, and then transfer to a freezer bag or airtight freezer container. The bread can store for 3-4 months!
🍞 Related Recipes


Tried this recipe? Please leave a star ⭐️⭐️⭐️⭐️⭐️ rating in the recipe card below and/or a review in the comments section further down the page. You can also stay in touch with me through social media by following me on Instagram, Pinterest, and Facebook!

Dutch Oven No Knead Bread
Equipment
- Dutch Oven
Ingredients
Regular No Knead Bread
- 3 cups Flour
- 1½ cup Warm Water
- 2 tsp Yeast
- 1 tbsp Salt
- 2 tbsp Sugar
No Knead Rosemary Sea Salt Bread (Variation)
- 3 cups Flour
- 1½ cups Warm Water
- 2 tbsp Yeast
- 1 tbsp Sea Salt extra if you want to sprinkle on top
- 2 tbsp Sugar
- 2 tbsp Rosemary fresh, chopped
Instructions
Regular No Knead Bread
- Combine all the ingredients into a bowl and stir with a wooden spoon. The dough will come together in seconds and come off of the sides of the bowl.
- Allow the dough to stay in the bowl on the counter, covered with Saran Wrap or Press and Seal for 16-24 hours. I have done 24 hours with no problems.
- When ready to cook, preheat oven to 450 degrees with the dutch oven in the oven when heating up. This is essential. I have preheated it up to 45 minutes and haven't seen a drastic difference in the outcome of the bread, so I just heat up in the oven as the temperature comes up.
- While the oven is heating up, remove the dough from the bowl and form into a ball. It may be a bit sticky which is fine. Don't work it, just form a big ball. Depending on the humidity in the air, I will add a teaspoon or so of flour to get it to work into a ball. Don't over do it though.
- When the oven is completely heated up, remove the dutch oven from the oven and place the ball of dough inside and cook for 45 minutes, covered. Remove the lid and cook an additional 10-15 minutes allowing the top to get a crusty brown color. Don't overcook as the outside will get too hard.
No Knead Rosemary Sea Salt Bread
- Combine all of the ingredients together in a bowl and stir with a wooden spoon until the dough is coming off of the sides
- This will only take a couple minutes. Cover the dough with saran wrap or Press N Seal for 16-24 hours as it will continue to rise. Once it is ready to bake, preheat the oven at 450 degrees and place the cast iron dutch oven in the oven to heat up.
- It is best to keep this in the oven 30-40 minutes to really make sure the dutch oven is extremely hot. This helps cook it from all sides and helps to resist the sticking! Roll the dough out and if it is extremely sticky, add a teaspoon of flour or so to just make it not so moist but you don't want it dry.
- Remove the dutch oven from the oven and place the dough in the dutch oven and cook for 20 minutes with the lid on. Check on the bread and see how it's going.
- At this point, I took the lid off and baked 20 minutes to make the outside crust crisp and yet have a very tender inside.
Notes
- Rosemary and thyme to make a delicious Herb Bread
- Cinnamon and raisins and you have the Cinnamon Raisin Bread
- Craisins and orange zest for a great Cranberry Orange Bread
- Blueberries and lemon zest for a Lemon Blueberry Bread
- Thanks for our awesome readers, I want to note that if you want to use herbs you will use 2-2 ½ TBSP FRESH herbs or 2-2 ¼ TSP DRY herbs. Also you will mix that in with all the ingredients at the beginning!
The last reason is that there might be too much liquid or moisture. The dough needs to be sticky but not out of control. If you need to add flour, add it by the teaspoon at a time but try not to overwork the dough either or it will get tough. I promise, this is an easy recipe but sometimes there might be a reason someone has an issue and I want to make sure we cover them all. Freezer Friendly: Just allow the no knead dutch oven bread to fully cool, and then transfer to a freezer bag or airtight freezer container. The bread can store for 3-4 months! Yeast: If you use active dry yeast, you just need to make sure to activate your yeast. By doing that you will just add your yeast to warm liquid, with a bit of sugar. Let it sit for 5-10 minutes. The yeast will begin to foam up, and that is when you know the yeast is blooming and active. No Dutch Oven? As long as you have a pan that can heat up to 450 degrees and has a lid, you should be good to go. Bread is Hard All The Way Through: It cooked too long. Make sure that your oven is calibrated to the correct temperature. Most of our ovens are off and having an oven thermometer really helps. I always suggest readers check recipes early and often when you aren’t sure and for first time recipes.
Nutrition
If you try this no knead dutch oven bread, let me know!
Hi!
Ginny Collins is a passionate foodie and recipe creator of Savor and Savvy and Kitchenlaughter. Indoors she focuses on easy, quick recipes for busy families and kitchen basics. Outdoors, she focuses on backyard grilling and smoking to bring family and friends together. She is a lifelong learner who is always taking cooking classes on her travels overseas and stateside. Her work has been featured on MSN, Parade, Fox News, Yahoo, Cosmopolitan, Elle, and many local news outlets. She lives in Florida where you will find her outside on the water in her kayak, riding her bike on trails, and planning her next overseas adventure.


The best no knead bread recipe I’ve ever come across! It’s perfect
Your recipe was perfect. I served it on the side of the pasta dish and it was a big hit! I have tried other no knead recipes but I will only use yours from now on. The only change I made was to use parchment paper to fold the dough and popped it into my Dutch oven. It was a breeze to take the bread out and it made cleanup a breeze. Good job. Thanks.
Christel! That is fabulous! Thanks so much for the kind words! That recipe is a keeper for us too. Love your parchment idea. Cheers~ Ginny
I make no-knead bread without a Dutch oven. I just use my ordinary bread pas, one of which is large and non-stick and the other is old and needs greasing. The bread comes out just fine. i both. Vogel’s is a no-knead bread and I can hardly imagine Quality Bakers having literally hundreds of these horrendously expensive things.
So glad it worked out great for you in a bread pan! That is fantastic!
Is it really 2 tbsp yeast?
Mine is risING.
Hi Barbara! Given we have two editors look over the recipe before I push go, we didn’t catch the TBSP!!! But you did. Thank you so much for saying something to me so I can fix it! I apologize for your RISING bread!!! How did it end up? I bet it was massive!!! Again, my apologies!! I changed the recipe card just now.
A friend served this bread at a luncheon the other day with plant based butter and curried tofu. It was wonderful@ Thank you so much for the recipe. 🙂
Awww, that is wonderful! So glad it turned out so well! Thank you for taking the time to tell us! We love feedback!
I have a 2qt cast iron pot. Will this recipe work in this size pot?
I would use a 4-6 qt. I think think 2 qt would be a smidge too small! Ginny
If you choose to add herbs, what quantity? Does the addition of herbs affect the cooking/rise time? Should herbs be fresh or dried? Add herbs at the same time as other ingredients or after? Thanks
Sherri, awesome questions! Thank you! I would add add 2-2 ½ tbsp of FRESH herbs or 2-2 ¼ tsp of DRIED herbs! Notice the fresh.is tablespoons! Dried is teaspoons! The herbs won’t change anything! Add the herbs at the same time as everything else. I’m going to go in and edit the post to reflect your question! Thank you so much for taking the time to ask!