I love to make these DIY Frozen Smoothie Packs! They are easy to put together and, best of all, they are extremely inexpensive. It is a great meal prep idea and you’ll make several days worth in just 10 minutes.
Having a few smoothie packs on hand helps make these hot summers a bit more tolerable. Not only are these super convenient, they’re extremely inexpensive and allow you to make a a cool treat in under two minutes. How’s that for a triple threat?
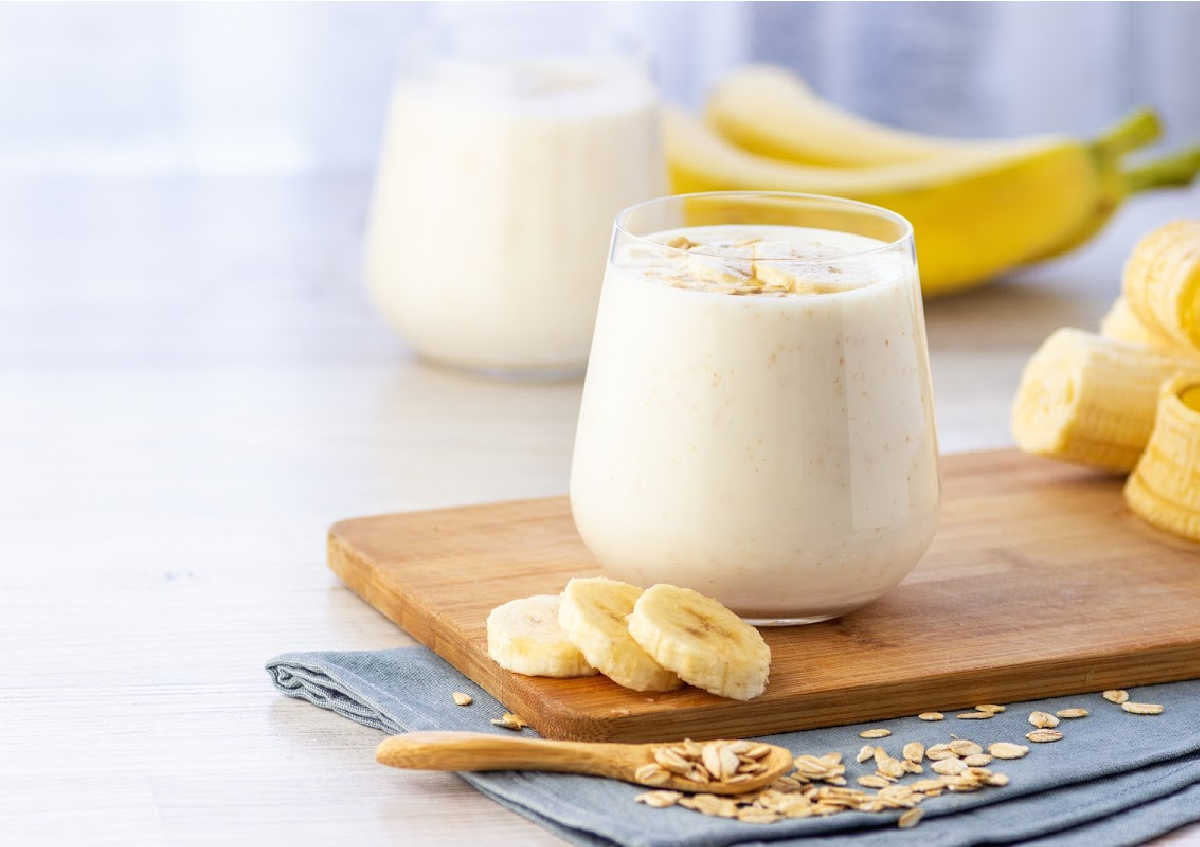
Just dump the contents of the smoothie pack into your magic bullet, Ninja or Vitamix, add water (or milk) and you’re good to go!
Update: I make these even cheaper by making my own yogurt!

🥤 Why This Recipe Works
Inexpensive – As I’ve mentioned, this is a steal as far as breakfast goes. Plus it’s healthy. So often we can get a cheap eat but it’s not healthy or good for us. This one we get both.
Healthy – This is made up of just fruits, ice and yogurt. Feel free to leave out the yogurt, if you like and just use the fruits and ice. Toss in a handful of leftover spinach for extra nutrition.
Versatile – Take this recipe as a guideline and use it as a “how to make” rather than the exact recipe using strawberries, bananas and apples. If you love pineapple, use that. If you have ripe peaches from picking last month, use those.
Fast – You only need a couple minutes to make 15-20 of these meal prep smoothies which is several weeks worth of breakfast in about 10 minutes.
🍌 Ingredients:
Note: This is just what I chose to go with. Use whichever fruits you’d like!
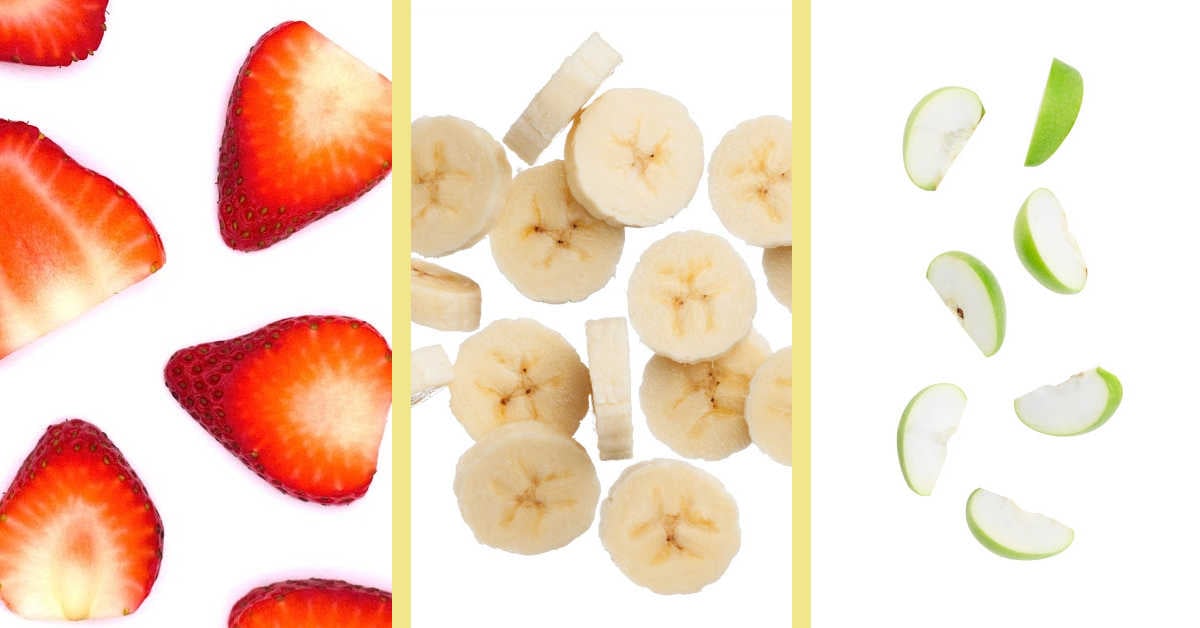
Fruit – Use any fruit you have left over at the end of the week. I had bananas, strawberries and apples. Don’t let anything go to waste.
Vanilla Yogurt – I used to add a scoop to the blender when it was time to make these, but a reader offered the idea to freeze the yogurt in ice cube trays and include the frozen yogurt in the smoothie pack. What an ingenious idea!
🍽️ Instructions

Step One: Slice your fruit. Any old fruit will do, but I like to use the fruits that are very ripe as they blend easier. Use any leftover fruit from the week. Nothing goes to waste!
Step Two: Line a cookie sheet or cooling tray with wax paper (or foil/parchment paper) and add the fruit in an even layer. If you have a small freezer, just add the fruit to plates and they’ll fit in easy. Flash freeze for at least two to three hours.
Step Three: Spoon yogurt into ice cube trays and place in the freezer along with the fruit. I recommend leaving them in there for at least four hours; I only left them in for two and it made things pretty messy.
Step Four: Put it all together! Place the frozen fruit and yogurt cubes into the snack bags. Each bag contained banana + yogurt, but I varied the strawberries and peaches to create different flavors.
Note: Place the snack sized Ziplocs into a quart sized freezer bag in order to avoid freezer burn. You’ll be able to fit four smoothie packs in one quart sized bag.
Step Five: It’s time to enjoy the fruits of your labor (get it?!)
When you are ready to make your smoothie, take it out of the freezer and dump the contents into your Magic Bullet blender. Add a little bit of milk or water and pulse it until it is smooth and creamy.
That’s it! Enjoy your breakfast!
I love making these! They’re simple, smart, frugal and save so much money over time! Please let me know if you make them. I’d love to hear what flavors you try!
🍓 Meal Prep Breakfast
These smoothie packets are low in calories as well, so they make a great breakfast or lunch for those of us that are trying to have a healthier early meal. When using these to stand in for a meal, I like to add in some oats and coconut milk rather than water just to make it more satisfying.
I created 14 smoothie packets and only spent about $8.25 for all of the ingredients. I’ll admit, the packets are on the small side, but I find them perfectly satisfying as-is or with the addition of ground oats to thicken them up (or just use more fruit!).
I added peanut butter to a few, but chose to omit that from the cost since I only added it to a few packets and this was experimental. Verdict: I like the PB with Strawberry/Banana. My husband? Not so much.
📌 Tools
Ziploc Snack Bags – These are perfect size for the single-serving ingredients and makes it easy to keep everything portion-controlled.
Freezer Bags – Don’t skimp here. Definitely get the freezer safe version so your ingredients don’t get freezer burnt. I know these cost a little bit more, but they are reusable, so it is really worth it.
Wax Paper – This is the best thing I could find to help the fruit pop free from the sheet after freezing. Try parchment paper or even aluminum foil if you don’t have any wax paper.
Ice Cube Trays – These are the perfect size for freezing small dollops of yogurt.
Recipe FAQ
If you use regular sandwich Ziploc bags, I would only do 2-3 weeks worth. After that you might start to get the freezer flavor creeping in. If you use regular sandwich bags and then put those in a large gallon freezer safe bag so they are protected, you could keep these up to two months. Print out the Freezer Tips and Storage times for your pantry for quick reference.
That’s tough because everything is frozen rock hard so you need a sturdy blender that is going to have blades and power to cut through the frozen fruit. A regular $20 blender most likely will not cut it. If you have a food processor, the blades on those are stronger and you could use those in a pinch. Try the Ninja as another option.
Tried this recipe? Please leave a star ⭐️⭐️⭐️⭐️⭐️ rating in the recipe card below and/or a review in the comments section further down the page. You can also stay in touch with me through social media by following me on Instagram, Pinterest, and Facebook!


DIY Freezer Smoothie Packs
Ingredients
- 2 Peaches
- 2 Bananas
- 10 Strawberries
- 1 tub Vanilla Yogurt
Instructions
Prepare the Ingredients
- Chop up fruit. Use very ripe fruit for the best results.
- Line a baking sheet with wax paper and lay the fruit slices on it. Place in the freezer for 3-4 hours.
- Place a few spoonfuls of yogurt into an ice cube tray and freeze for four hours.
Make the Smoothie Packs
- After four hours, remove all of the ingredients from the freezer
- In a snack-sized Ziploc bag add a few pieces of fruit and one or two frozen yogurt cubes
- Close the bag and place the sealed bags in a larger, quart-sized freezer bag to minimize the chance of freezer burn.
- Add the freezer bag back to the freezer and take out individual smoothie packs when you want a light breakfast
Making the Smoothie
- Add the contents of one bag to the blender
- Add a little bit of water or milk and pulse until smooth
- Enjoy!
Notes
Nutrition
Hi!
Ginny Collins is a passionate foodie and recipe creator of Savor and Savvy and Kitchenlaughter. Indoors she focuses on easy, quick recipes for busy families and kitchen basics. Outdoors, she focuses on backyard grilling and smoking to bring family and friends together. She is a lifelong learner who is always taking cooking classes on her travels overseas and stateside. Her work has been featured on MSN, Parade, Fox News, Yahoo, Cosmopolitan, Elle, and many local news outlets. She lives in Florida where you will find her outside on the water in her kayak, riding her bike on trails, and planning her next overseas adventure.
For reference, how much did each of your packs make?
Each packet makes one serving (I make it in the single-serve magic bullet cups). The ounces will depend on how much milk/ice you add.
Love it, I have made them individual , this is quick and easy. To add more protein, try non fat dry milk, flax seed.
Quick question, do you think I could use vanilla pudding??? lol My husband “knows” it has yogurt in it and is freaking out without giving it a try… lol thanks!!!
Great idea! I haven’t really gotten into smoothies yet, but I bet I would do it if I was this prepared!
We’d love for you to share this at Tips and Tricks Tuesday with us! It’s a place for people to share and seek out advice related to healthy living and weight loss. Love to see you there!
Kristin
Exploringdomesticity.blogspot.com
These are great little treats to have around-I could probably eat about 10 myself! love it… (Sharon)Just wanted to give a big thank you for sharing at the BeBetsy BRAG ABOUT IT. Sharon and Denise ♥Fashion | Food | Beauty | Out & About and Morning Coffee articles
Great tips and tutorial! I’m a smoothie junkie myself and this will save tons of time and money. I do add spinach to my smoothies for the extra nutrients.
Katie @thecasualcraftlete.com
Love this idea!!! So convenient to have everything ready!
love this what a great idea for busy families on the go
come see us at http://shopannies.blogspot.com
Thank so much, Angie!
Found this on the Frugally Sustainable blog hop. This is such a smart idea – my bananas always get overripe by the end of the week. I also hate making one huge smoothie and then leaving it in a pitcher in the fridge. The ingredients always separate by the end of the week. This is so much smarter!
Thanks for stopping by, Jill!
Great idea! I really need to do this because I want to include more smoothies in my world but never get around to it. Thanks for sharing at I Made It! Monday. Can’t wait to see what you link up this week.
Thanks for stopping by, Amanda. Doing it all in one shot definitely makes smoothie making a lot easier!
Hey! Love, love, love this idea! Thanks! And by the way, we are featuring this link up on the On Display Monday Link Party! Great idea! Thanks for sharing!
Thanks so much, Danielle!!!
Great idea! We make smoothies all the time, but typically I am out of an ingredient or 2 to make exactly what I want. It would be great to have it all on hand.
Thanks for sharing.
Sarah
http://www.creativeramblingsblog.com
It really does make having smoothies a painless process. Thanks for stopping by. 🙂
What a great idea!!! Thanks for sharing at Simple Supper Tuesday.
Thanks, Cindy! Love the party!
What an inspiration, I love frozen fruit, esp. smoothies. Looks perfect. Kathy
Thanks for stopping by, Kathy!
Jazmin,
Great tutorial! I had to laugh when I read how long to freeze the fruit! I pinned it.
LOL Thanks! It’s a fabulous method of making sure it’s properly frozen. 😉 Thanks for visiting and pinning, Jann!