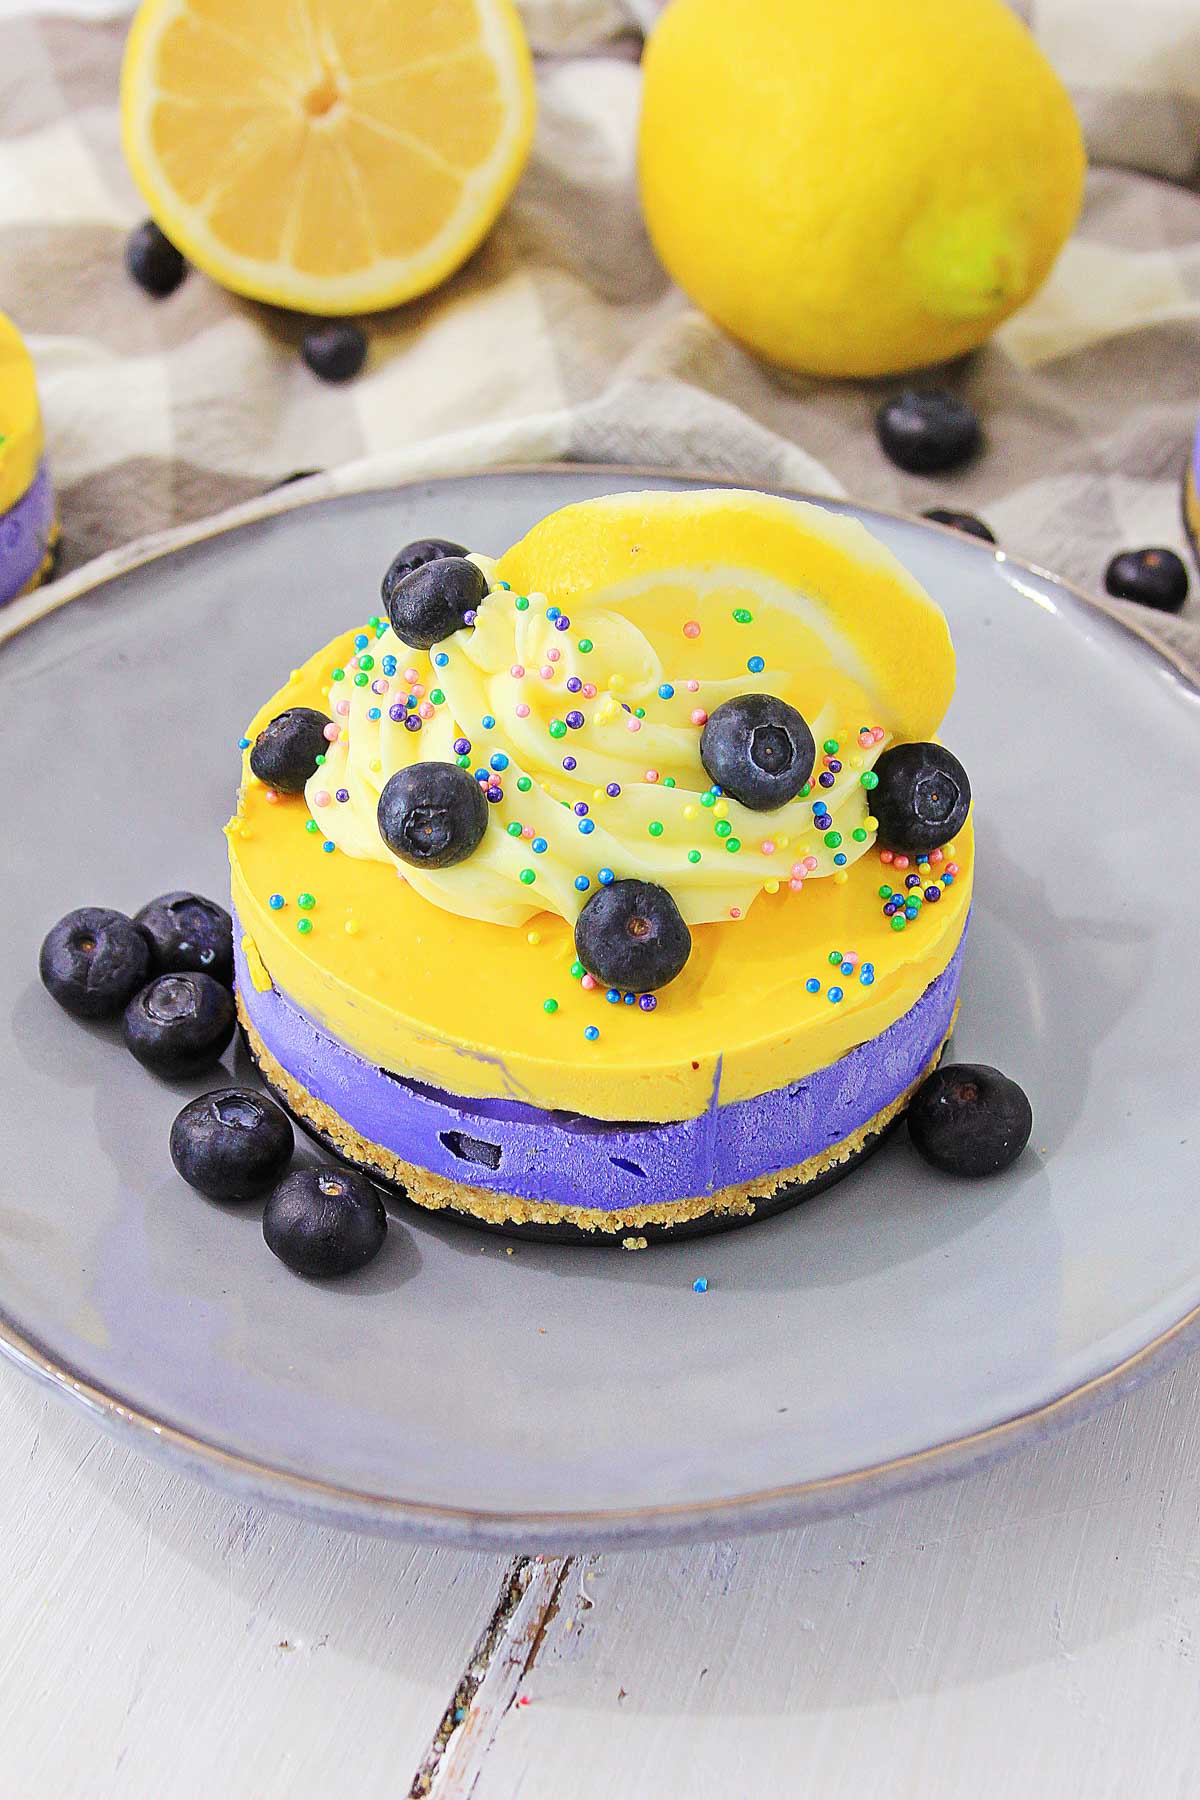
My go to desserts when I’m hosting are the ones I can make completely ahead of time. This no-bake lemon blueberry cheesecake is perfect for that! You just whip it up, let it chill in the fridge, and you’ve got yourself a fancy-looking dessert ready to impress your guests. All of that with zero baking!
Don’t let the number of steps fool you! I broke it down so anyone can feel confident to make this. I pinky swear that this is super simple to make!
One more thing on this awesome recipe. You can easily cut the recipe in half if you only want to make a couple with no problem. Feel free to skip the food coloring altogether if you have sensitivities to them.

🍋 Ingredients
Crust
✅Graham Crackers – The heart of the crust is made from crushed graham crackers. They are easy to crush when using a food processor and make the best and most delicious crusts ever. Stick with traditional graham crackers or choose a flavored variety like chocolate or cinnamon. Oh, yum!!!
✅Butter
✅Sugar
Cheesecake Filling
✅Cream Cheese – The real star is the cream cheese. It gives a velvety texture that tastes phenomenal. Use the full fat or a reduced fat variety if you wish. Both will provide excellent results, and the flavor will remain rich and delightful either way.
✅Lemon – The other key ingredient in this recipe is lemon. You will get the lemon flavor from the lemon instant pudding, lemon juice, lemon extract, and lemon frosting. It gives you an intense citrus flavor that is refreshing and a beautiful combination with the fresh blueberries.
✅Vanilla extract
✅Lemon extract
✅Lemon instant pudding
✅Half and half
✅Lemon frosting
✅Neon food coloring – I used blue, green, and purple.
✅Blueberries
✅Powdered sugar
🍽️ Instructions
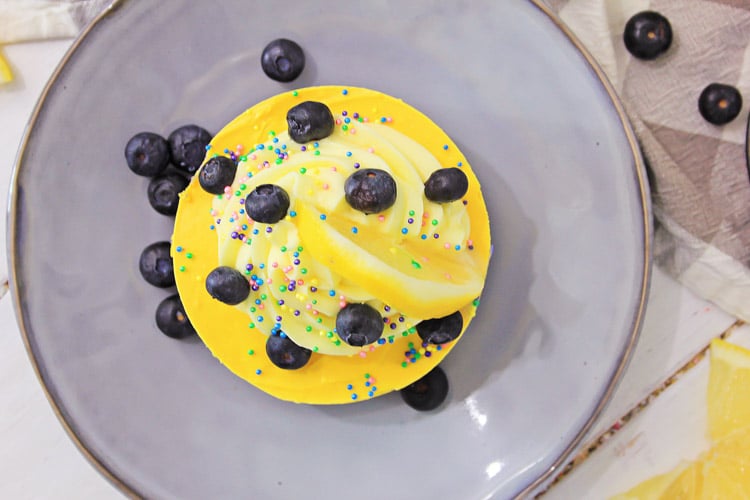
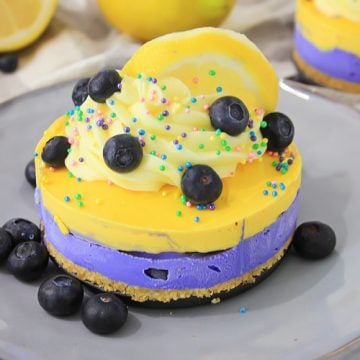
The vibrant colors of the purple and bright yellow in this recipe keeps them looking elegant. I love serving fun and stylish recipes for my family and friends.
Check out the easy no-bake instructions:
👉Step 1: Blend the graham crackers in a food processor. This will chop them into fine crumbs.
👉Step 2: In a microwave-safe bowl, melt the butter.
👉Step 3: Add one heaping tablespoon of sugar to the graham cracker crumbs. Pour in the melted butter and mix together until all the crumbs are wet and buttery.
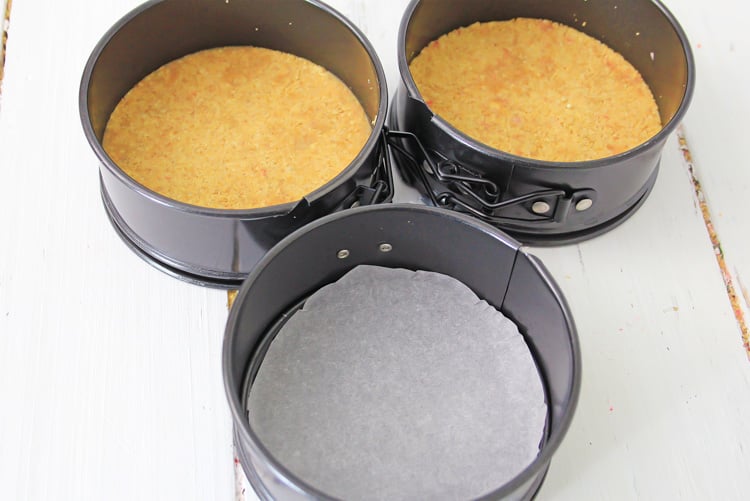
👉Step 4: Line six mini spring-form pans with parchment paper. Divide the graham cracker crust among the pans evenly. Press the crumbs firmly, so they form a crust. Place them in the freezer.
👉Step 5: Add the cream cheese to a bowl and mix using your stand mixer or a handheld mixer until it’s smooth and creamy. If needed, scrape the sides of the bowl.
In another bowl, mix the vanilla pudding and one cup of the half and half. It should be thick and smooth when it’s done. If needed, add up to two additional tablespoons of half and half. You want the pudding to be nice and thick.
👉Step 6: Scrape the pudding into the bowl with the cream cheese and mix until they are well combined. Drizzle in the lemon juice and vanilla. Mix again to combine.
Be sure to scrape the sides of the bowl, so everything is properly combined. Add in the powdered sugar and mix some more.
👉Step 7: Divide the cheesecake batter in half. One half needs the yellow food coloring. Then add the lemon extract and mix well.
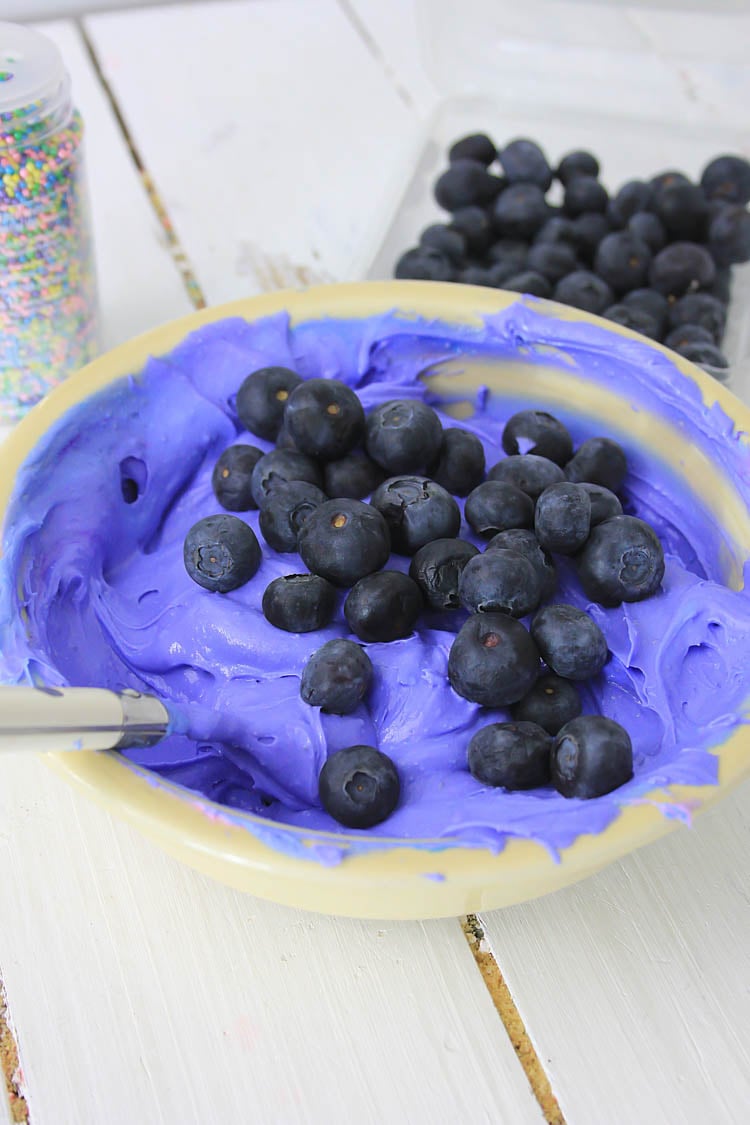
👉Step 8: Add the blue and purple food coloring to the other half of the cheesecake batter and mix well. It should be a lovely violet color when done. Fold in the blueberries.
Note: I know some folks are very sensitive to food coloring, so don’t worry about it if you need to leave it out.
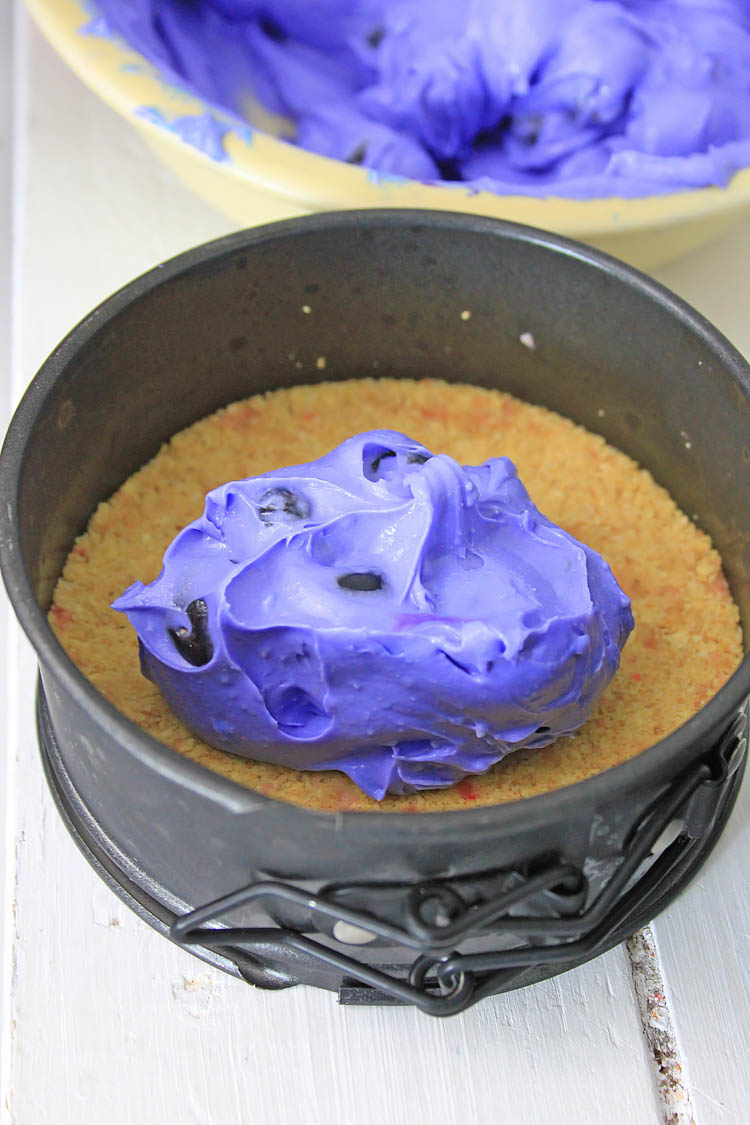
👉Step 9: Put the lemon cheesecake mixture in the fridge. Remove the spring-form pans from the freezer and layer the blue cheesecake mix in each pan. Be sure to smooth out the tops. Then freeze for 45 minutes.

👉Step 10: After freezing for 45 minutes, take them out of the freezer and add the lemon layer to each one. Make sure to use an equal amount and make it even and smooth.
🍋 Decorating
👉Step 1: Refrigerate sliced lemons and organic blueberries.
👉Step 2: Fill a pastry bag with lemon frosting. Use the large tip and pipe dollops of frosting in the center. Then sprinkle with nonpareils.
Add half of a lemon slice to each one and sprinkle some blueberries on top. Place the cheesecakes in the freezer for at least 45 minutes or until ready to serve.
👉Step 3: Remove from the freezer 15 minutes before serving. Pull the spring that is located on the sides of each of the pans. Slide off the spring-form using a cake server or a thin knife.
Remove the cheesecakes from the bottoms of the pans and remove the parchment paper. Put them on a dessert plate and enjoy!

🍱 Meal Prep Instructions
We love making meals ahead of time as much as we can and this one offers lots of opportunities!
👉Crush the graham crackers ahead of time and put them in a ziplock bag or air tight container.
👉Measure out everything and cover in the refrigerator on a platter. People laugh at this one but it saves a ton of time.
👉Prepare the pans with parchment paper.
👉Prep the mixer and tools so you are simply assembling this when it’s time.
All of these little things add up to massive time savings!
🧊Freezer Instructions
These will last up to 3 months in the freezer. Keep them wrapped up tightly and freeze until you need them. It’s perfect to make them ahead of time, so you have them ready whenever something last-minute creeps up or you are in the mood for cheesecake (and who isn’t in the mood for that?!).
📌Place the cheesecakes on a sheet pan and FLASH FREEZE them. Put them in the freezer for several hours, remove them, and then pack them up for a long-term freeze.
When I do this, I double wrap everything. I don’t want freezer burn so I invest the time in to wrapping it twice to save the money and agony of tossing it out. My preferred method is to flash freeze, wrap in Press N Seal and then place in gallon Ziploc bags.
My mom wraps them in foil and then the gallon zip lock bags. Both work beautifully.
🔄 Substitutions
As with many of my recipes, you can make some swaps and substitutions! This is ideal when you have food aversions, allergies, or you simply ran out of something. Try some of these substitutions:
🔸Graham Crackers – Substitute the graham crackers for your favorite cookies like vanilla wafers, Oreos, or chocolate chip cookies. You can even use gluten-free graham crackers to make it a gluten-free option.
🔸Extracts – If you want to change the flavor, try almond, orange, or lime extract in place of the lemon. Yum!
🔸Cream Cheese– Using a lower fat cream cheese is always an option if you are trying to cut back on fat and calories. It will not be quite as creamy, but will still be good.
🔸Pudding – Change the variety of pudding. Vanilla, banana cream, white chocolate, pistachio, and butterscotch are a few options that come to mind.
🔸Frosting – Using a plain vanilla frosting will give you a lovely cheesecake too. Strawberry would also be a great option.
Keep in mind, as you change ingredients, the flavors, and sometimes textures will change. If changing more than one item, you want to make sure to pick complementary flavors.
🎉 Change the Theme
Change up the food dye colors to mix up the theme. Here are a few ideas to consider.
- Pink – Make a combination of yellow for the lemon and pink for the other color. It is lovely with some fresh strawberry slices or raspberries as a garnish.
- White – Leave one layer of the cheesecake it’s natural creamy color. Then, garnish with any fruit. Oranges, limes, or anything else that fits your desire! Add a sprig or two of gorgeous bright green mint to really complement the colors.
- Green – Green is fantastic for any kind of spring event. Add lime wedges or kiwi fruit to finish the look.
- Your Child’s Favorite Colors – I would love to make these for my kiddo’s birthday party! Look below at the Cadbury version and if it didn’t have eggs on it, you would swear it was to celebrate a birthday! Think how easy it would be and yet massively impressive!
Also, check out my Twix cheesecake if you’re looking for more easy no-bake cheesecake recipes.
❓ FAQ
No bake cheesecakes absolutely need to be refrigerated. It will lose its consistency and make a mess if left out at room temperature.
They are amazing! The no bake varieties offer a creamy and smooth texture. A traditional baked cheesecake has a thicker velvety texture. Both are delicious.
Feel free to swap the classic buttery graham cracker crust, with crushed Golden Oreos, gingersnaps, etc. Adjust the crust with your favorites.
Tried this recipe? Please leave a star ⭐️⭐️⭐️⭐️⭐️ rating in the recipe card below and/or a review in the comments section further down the page. You can also stay in touch with me through social media by following me on Instagram, Pinterest, and Facebook!
🍰 Related Recipes


No Bake Lemon Blueberry Cheesecake
Equipment
- (6) 4" Mini Springform Pan
- Stand Mixer
Ingredients
Graham Cracker Crust
- 2 sleeves Graham Crackers crushed in food processor
- 1 stick Butter melted
- 1 tbsp Sugar
Cheesecake
- 24 oz Cream Cheese softened
- 1 cup Powdered Sugar
- 1 tbsp Vanilla
- 1 tsp Lemon Juice
- ½ tsp Goodmans Lemon Extract sold at Walmart
- 6 oz Lemon Pudding Mix instant
- 1 cup Half and Half
- 2 tbsp Half and Half see instructions
- Neon Food Coloring
- 1 can Lemon Frosting Betty Crocker
- Nonpareils blue, green and purple were used in photos
- 1 pint Blueberries
- 1 Lemon
Instructions
Graham Cracker Crust
- In a blender or food processor, mix graham crackers on high speed until they are fine crumbs. Melt the butter in the microwave. Mix a tablespoon of sugar with the graham cracker crumbs and add the butter. Stir well until all the crumbs are coated in the butter.
- Line each of the six mini spring-form pans with parchment paper, and place an equal amount of graham cracker crumbs in each of the mini pans. Press the graham cracker crumbs firmly into the pans, and place the pans in the freezer.
Cheesecake
- Place the cream cheese in the mixing bowl of a stand mixer and blend until smooth. Scrape down the sides of the mixing bowl.
- In a separate bowl, place the Vanilla instant pudding and one cup of half and half. Blend until it is thick and smooth. Add up to two more tablespoons of half and half as needed to make sure the pudding is thick, but not so thick you can't stir it.
- Add the pudding to the cream cheese in the mixing bowl, and mix until completely blended. Add the lemon juice and Vanilla and blend well. Scrape the mixing bowl, and blend again. Add the powdered sugar and mix.
- Divide the cheesecake batter in half. Leave half in the mixing bowl and add yellow food coloring gel. Mix until blended. Add ½ teaspoon of lemon extract and blend again until well mixed.
- Place the mixing bowl, with the lemon cheesecake in the refrigerator.
- In the bowl with the other half of the cheesecake mix, add the Neon blue food coloring gel and Neon purple food coloring gel (about ½ teaspoon of each) and mix well. The batter will turn bright violet blue. You may have to add a little more of the blue, or the purple to get the desired color.
- Mix in some blueberries into the violet cream cheese mix.
- Remove the mini spring-form pans from the freezer and place an equal amount of the blue layer of cheesecake in each pan. Smooth the top. Place them in the freezer for 45 minutes.
- After the 45 minutes is up, remove the mini pans and layer an equal amount of the yellow, lemon layer of cheesecake on top of the blue layer in each pan. Smooth the top evenly in each pan.
Decorating Instructions
- Wash and slice a large Meyer lemon, and place in the refrigerator. Wash one pint of organic blueberries, and refrigerate.
- Using the large tip, place it in your pastry bag, and fill the bag with the lemon frosting. Pipe large dollops of frosting in the center of each of the spring-form pans, on the cheesecake.
- Sprinkle with Nonpareils. Place half of a lemon slice in the frosting, and sprinkle blueberries on top of the cheesecake. Place the mini cheesecakes back in the freezer for at least 45 minutes or until ready to serve.
- When ready to serve, remove the cheesecakes from the freezer for about 15 minutes before serving. Pull the spring on the side of the pans to loosen the form from the cheesecakes. Slide the spring-form off the pan, and with a cake server, or thin knife, gently remove the cheesecakes from the bottom of the pans, and remove the parchment paper, leaving it on the pan. Place the cheesecakes on a dessert plate, and serve at once. Enjoy!
Notes
Nutrition
Let me know how you like this lemon blueberry cheesecake!
Hi!
Ginny Collins is a passionate foodie and recipe creator of Savor and Savvy and Kitchenlaughter. Indoors she focuses on easy, quick recipes for busy families and kitchen basics. Outdoors, she focuses on backyard grilling and smoking to bring family and friends together. She is a lifelong learner who is always taking cooking classes on her travels overseas and stateside. Her work has been featured on MSN, Parade, Fox News, Yahoo, Cosmopolitan, Elle, and many local news outlets. She lives in Florida where you will find her outside on the water in her kayak, riding her bike on trails, and planning her next overseas adventure.


So incredibly pretty!