If you think you need a giant, fancy mixer to make amazing bread at home, I’m beyond thrilled to tell you you’re wrong! This easy homemade breadsticks recipe is a “no mixer, no bread maker” dream, and they come out perfectly fluffy and delicious every single time.
Who needs scented candles? If you want your house to smell like pure, cozy heaven, just bake a batch of these breadsticks. At least you won’t need to call your family to the kitchen when dinner is ready.
They’re already there. WAITING 👀🤤

🥖 Ingredients
✅Yeast – If you’re new to making homemade bread, here’s how to know if your yeast is actually alive. The yeast is ready when you can describe it in one of the following terms: foamy, bubbly, frothy. It should also roughly double in size.
✅Sugar – Think back to your high school science classes. It’s sugars that feed the yeast and help the bread dough rise.
✅Flour – Like all good breads, it’s flour and water that bind it all together. Have some fun and mix up the types of flours in this recipe. I used a simple enriched white flour.
👩🍳 Instructions
👉Step 1: Combine the yeast, sugar and warm water in a small cup. Wait ten minutes until it is frothy. That’s just the yeast doing its thing and it means that it is still active and will help your dough rise nicely.
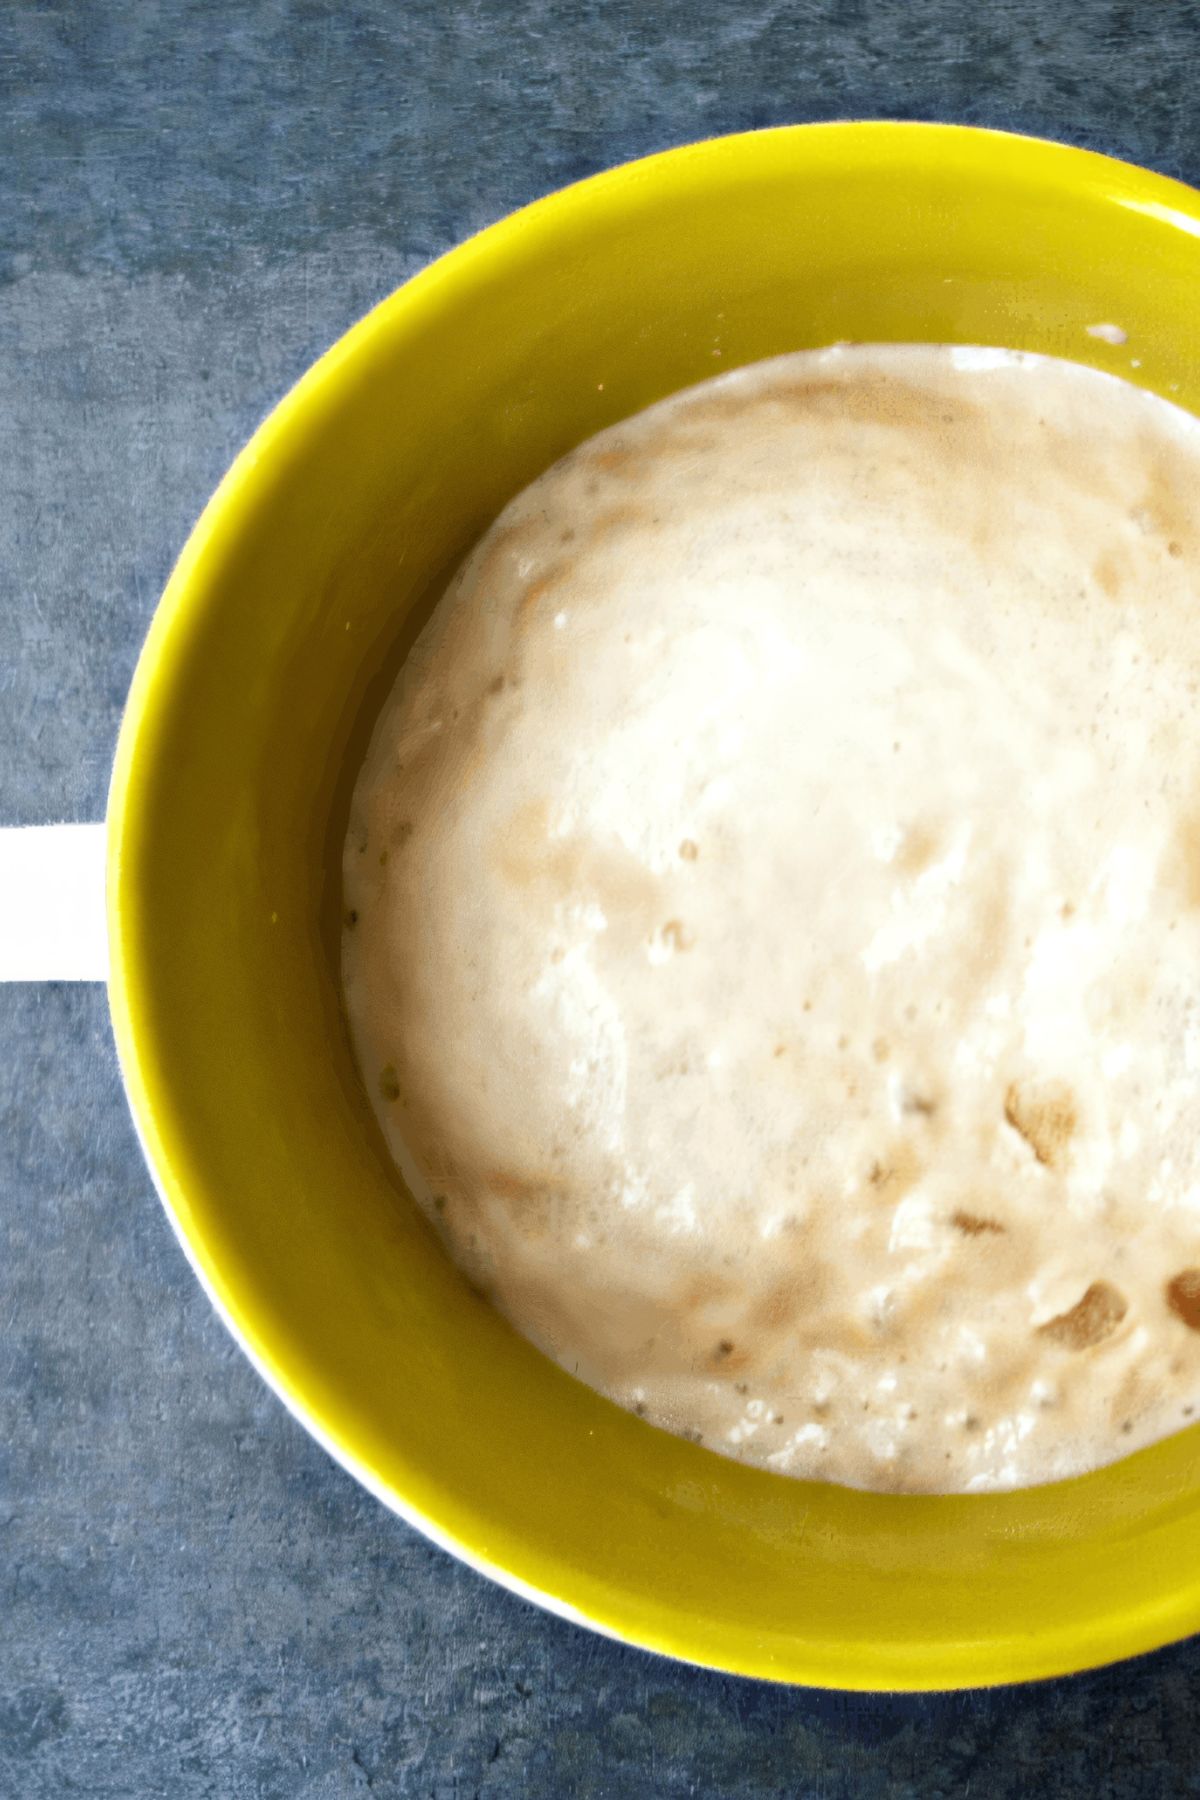
If your proofed yeast looks anything like the picture, chances are you’re good to go.
👉Step 2: Combine the proofed yeast with salt and flour and mix well by hand. If you don’t want to get your hands dirty use a silicone spatula at first. It will work better than a wooden one. The mixture will be sticky at first, so keep mixing until it comes together. This will take 2-3 minutes.
👉Step 3: Roll out the dough on a lightly floured surface and then knead it by hand. Add a sprinkle of flour at a time if it feels too sticky. It will be ready once it is very smooth and doesn’t stick to your hands anymore.
👉Step 4: Form the dough into a ball and place it in a lightly greased bowl. Cover it with a lid or a kitchen towel and let it proof for one hour.
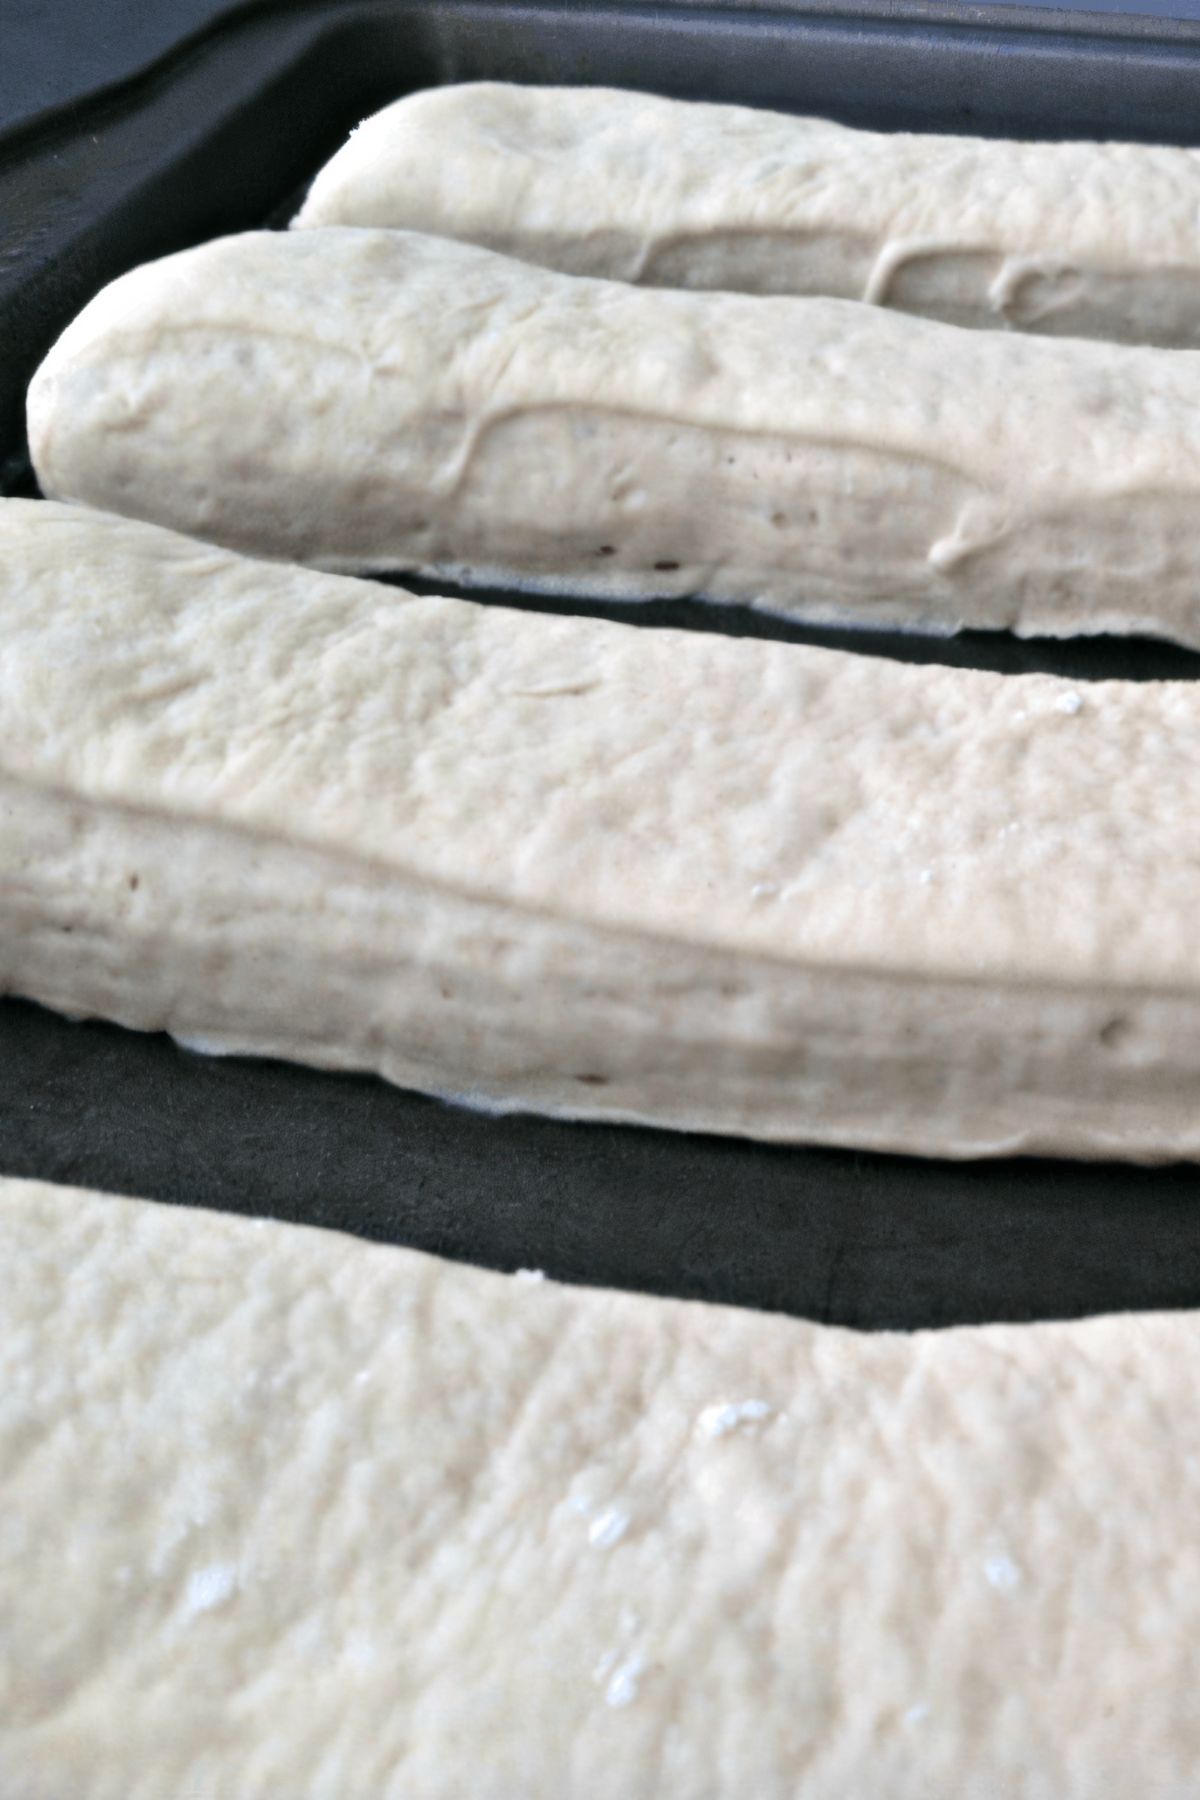
👉Step 5: Use the rolling pin to form it into a rectangle about 1/2″ thick. Cut it lengthwise into 12 breadstick shapes and place them on a lightly greased sheet pan for an hour to rise. I covered them with a kitchen towel to retain the heat.
👉Step 6: At the 45-minute mark preheat the oven to 450°F. Once it’s heated, brush the breadsticks with melted butter and bake for 20 minutes.
👉Step 7: Remove from oven and brush the breadsticks with melted butter again. Bake for 5 more minutes. Remove from the oven and let them cool before serving.
That’s it! Seriously easy!!!
💡 Expert Tips
🔸You can use fresh yeast instead of dry. It will still need to be activated the same way, using warm water and a bit of sugar.
🔸You can proof the dough in just 30 minutes (so 2x faster) if you have an Instant Pot. Form it into a ball and grease the Instant Pot liner. Place the dough ball in the Instant Pot, cover with a glass lid, and select the Yogurt setting. The dough will also proof faster in the oven with the light turned on (the oven should be off; the low heat from the lamp is just enough to help your dough rise faster).
🔸When cutting your dough, you have two options in styling your breadsticks. You can go the uber-fancy way and form them to shape by hand. Or, you can just slice them into sticks with a pizza cutter and call it a day. I chose the latter because I am terrible at hand-rolling breadsticks. I am really, really bad at it.
🔸Help, my yeast isn’t frothy! The sugar and warm water should activate the yeast. If you don’t see any bubbles after 5-10 minutes it means it’s not alive.
You might wonder how this can happen. Well, there are 2 common reasons: a) the yeast is expired (or wasn’t stored properly), or b) the water you used was hot, not warm. Hot water will definitely kill your yeast.
🔸You can skip the manual kneading and use a stand mixer. This doesn’t affect the recipe.
🧀 Variations
Of course, plain breadsticks are great as they are, and make a delicious universal side. However, this simple recipe is the perfect base for all kinds of fun flavors!
⭐Garlic butter breadsticks – This is our favorite! Simply melt your butter with 1-2 cloves of minced garlic and a teaspoon of dried parsley. Brush this on in Steps 5 and 6 instead of plain butter.
⭐Cheesy breadsticks – After brushing with butter in Step 5, sprinkle the breadsticks generously with grated Parmesan or a shredded Italian cheese blend before baking.
⭐Cinnamon sugar sticks – For a sweet treat, brush with plain melted butter as directed. As soon as they come out of the oven in Step 6, brush them again and immediately sprinkle with a mix of cinnamon and sugar. They’re amazing!
⭐Everything breadsticks – After brushing with butter in Step 5, sprinkle them with ‘Everything But The Bagel’ seasoning.”
❓ FAQ
After baking and cooling, keep them in a storage bag or wrapped in tin foil. They can be kept at room temperature and will typically last 3-5 days.
The easiest way to reheat breadsticks is to put them in the oven at 350 degrees for a few minutes until they are hot. Alternatively, cover them with a damp paper towel and microwave for 15-20 seconds.
Related Recipes


Tried this recipe? Please leave a star ⭐️⭐️⭐️⭐️⭐️ rating in the recipe card below and/or a review in the comments section further down the page. You can also stay in touch with me through social media by following me on Instagram, Pinterest, and Facebook!

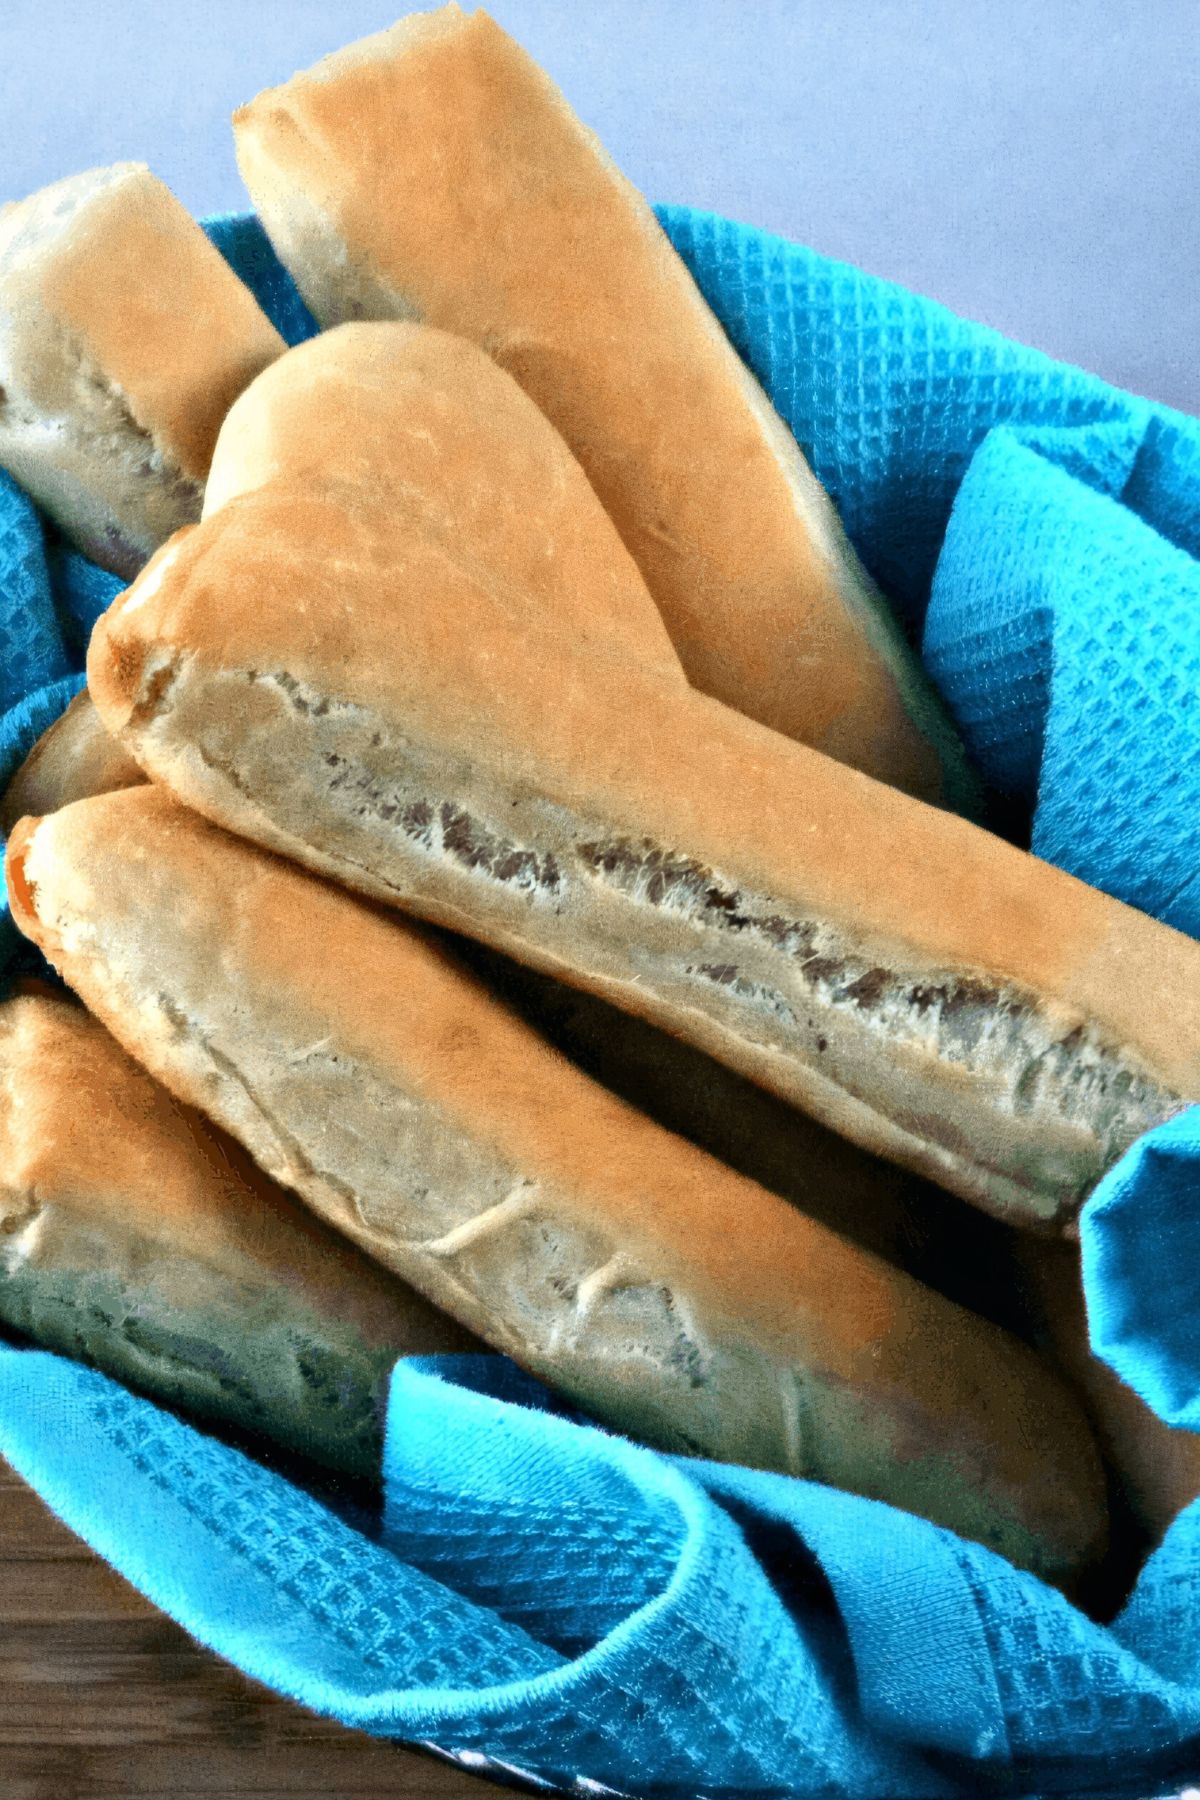
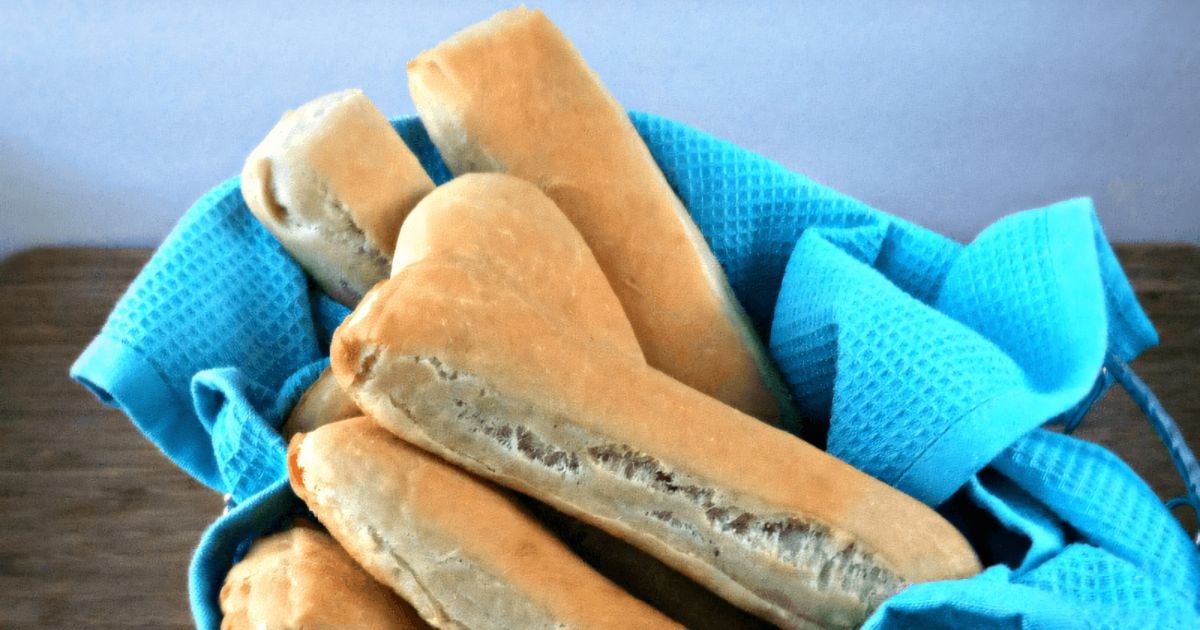
Easy Homemade Breadsticks
Ingredients
- 1 packet Dry Yeast active
- ½ cup Water reserved, warm
- ½ tsp Sugar
- 3½ cups Flour plus more for dusting
- 1 tsp Salt
- 3½ tbsp Butter melted
Instructions
- Pour yeast into a small bowl. Add the ½ cup warm water and sugar. Stir together. Let sit for 10 minutes.
- Once yeast is foamy, combine flour and salt and mix wet mixture into dry ingredients.
- Mix well with silicone spatula until a sticky dough forms. Continue to mix with spatula for 2-3 minutes. Then roll dough out on floured surface.
- Knead with floured hands for 10 minutes. If the dough is hard to work with, dust with additional flour. Using only a tiny bit at a time so it doesn't dry out. The dough is ready when it is relatively smooth and no longer sticking to your hands. You can use a mixer for this as well, and the same principle applies.
- Form the dough into a ball and transfer to a lightly greased large bowl. Set the bowl in a warm location, cover, and let rise for 1 hour.
- Transfer dough onto floured surface and use a rolling pin to roll out into a rectangle. Cut lengthwise into six long pieces (a pizza cutter makes this super simple). Cut once more in the middle to create 12 breadsticks.
- Place breadsticks on a lightly greased cookie sheet. Let rise for 1 hour.
- Preheat oven to 450 degrees. Melt butter and brush over breadsticks. Bake for 20 minutes. Remove from the oven, brush with reserved melted butter. Bake for another 5 minutes. Remove from the oven and let cool before serving.
Notes
How to Proof Dough in Instant Pot
- Assemble your dough as you would, and then grease your Instant Pot liner.
- Add in the dough and place a glass lid on top of your Instant Pot. Select the yogurt setting and let it rise for 30 minutes. Remove dough and then move on to the next steps in the recipe.
Nutrition
Hi!
Ginny Collins is a passionate foodie and recipe creator of Savor and Savvy and Kitchenlaughter. Indoors she focuses on easy, quick recipes for busy families and kitchen basics. Outdoors, she focuses on backyard grilling and smoking to bring family and friends together. She is a lifelong learner who is always taking cooking classes on her travels overseas and stateside. Her work has been featured on MSN, Parade, Fox News, Yahoo, Cosmopolitan, Elle, and many local news outlets. She lives in Florida where you will find her outside on the water in her kayak, riding her bike on trails, and planning her next overseas adventure.


I haven’t made bread in years but these breadsticks look amazing!!! I would love to experiment with some herbs in there.
Oh what a great and easy recipe! I love bread and this would go great with Pasta (which we eat all the time over here).
I love cheesy garlic breadsticks with marinara sauce. I love easy to make recipes and this one seems pretty easy although yeast intimidates me.
They’re perfect for little hands.
I don’t think I’d take the time to roll them. I’d slice like you did. The important thing is the TASTE!
My thoughts exactly! 🙂
They Look Delicious I Must Make Thank You
Hope you like them!
I love breadsticks!!! These look pretty easy to make so next time I make an Italian dinner I am going to try them!!! Thanks for the recipe!!
They go great with Italian. 🙂
the breadsticks look fantastic I bet they taste amazing thanks for the recipe!
In my (not so biased) opinion, they do taste great!
I would love to try these this summer, we love bread maybe too much;)
Enjoy. I know the battle, sister. 😉
Love making breadsticks. I use a knife also.
I used a pizza cutter for these but a knife also makes it super simple and it’s something we all have. 🙂
Yum! Breadsticks are my favorite. I could eat baskets of them all by myself. Thanks for the easy to make recipe!
I can too! We’re a household of two and that batch I made for the post only lasted a day and a half!
I consider myself the carb queen so this is the perfect recipe for me! I love breadsticks especially when they’re homemade. These look soft and fluffy and delicious!
Thanks, Jessica!
These look beautiful and professional in my opinion!! When I make breadsticks they come out looking terrible but I think I will try your recipe because it looks easier!
Thanks, Jennifer! If I tried to roll them, they would’ve been a hot mess. That’s why I prefer to just cut them. Super simple and I can call them “rustic” if anyone complains that they’re imperfect. 😉
We love bread with our dinners. Especially if it’s something with sauce so we can dip the bread in it 🙂
That’s one of my favorite ways to have breadsticks too 🙂
Yummy! I’m going to try making these when I make my Chicken Fettuccini Alfredo next!
Oh that sounds like a great way to serve them!